Church Notice Board: 8 Easy Steps to Clear Announcements

A church notice board can answer everyday questions before anyone needs to find an administrator. Service times, event details and office information are useful only when people can find the current version quickly. A crowded board with faded posters and expired dates may contain plenty of information while communicating very little.

This guide explains how to plan a church notice board as a working communication point. It covers location, content, ownership, print quality and weekly maintenance. You can apply it to a new board or improve an existing one without replacing everything. Start by deciding what visitors and members need to know, then organise the space around those questions.
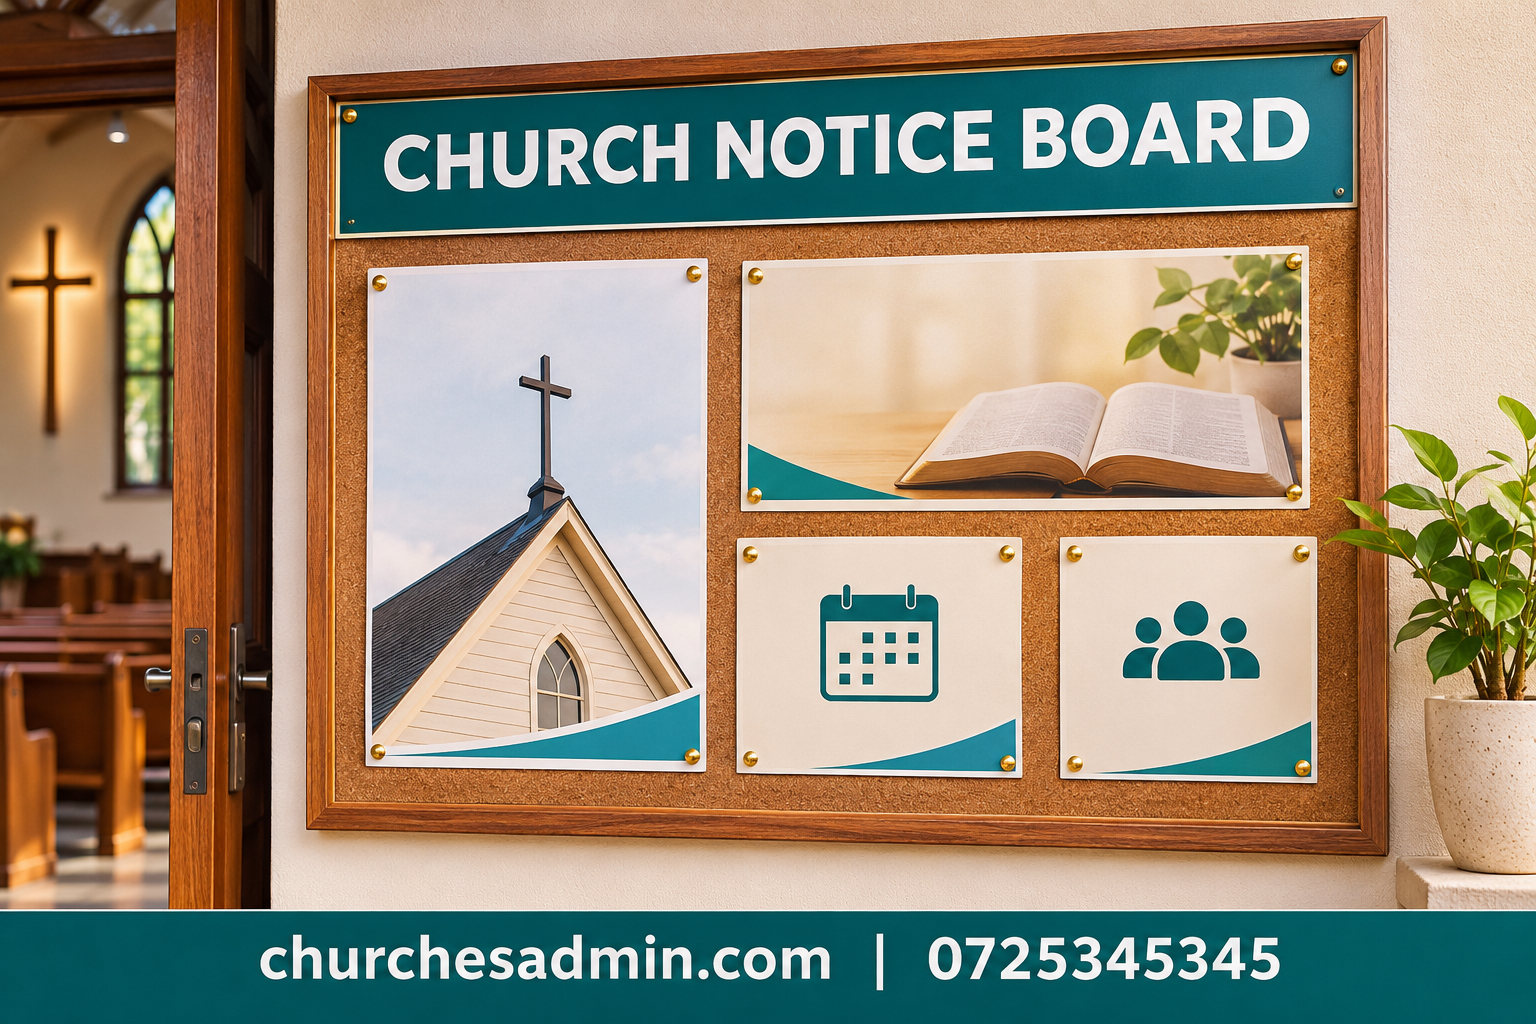
church notice board planning illustration
Church Notice Board | churchesadmin.com | 0725345345

1. Give the church notice board a clear purpose

List the questions people commonly ask at the entrance or office. These may concern service times, upcoming activities, registration, room locations or the office contact. Use real questions rather than filling the board with whatever material happens to arrive first.

Separate essential standing information from temporary announcements. Service details may remain in place for a longer period, while an event poster needs a removal date. Treating both categories the same makes it easy for temporary material to crowd out the information people need every week.

Connect the board to the wider church communication plan. It should reinforce approved information, not become an independent channel where dates and wording differ from announcements or messages sent elsewhere.

2. Choose a location people can actually use

Observe where people enter, pause and ask questions. A board should be visible without obstructing movement or requiring someone to stand in a busy doorway. Consider lighting, weather exposure and whether the intended readers can approach comfortably.

Test the location with a few sample notices before buying a larger board. Ask people to find a specific piece of information. If they walk past or cannot read it comfortably, the issue may be position rather than design. A prominent wall is not automatically a useful reading point.

For outdoor or enclosed boards, ask the supplier about the product’s intended conditions, installation and care. Have mounting assessed and completed appropriately. Do not assume that an indoor product will tolerate an exposed location simply because its frame looks sturdy.

3. Create a small number of sections

Use clear headings that match common questions. A practical arrangement might include “This Week,” “Upcoming Events” and “Office Information.” Adapt the labels to the church rather than copying a complicated category system that volunteers struggle to maintain.

Give each section enough space for its actual content. If every area is permanently full, reduce the number of notices or use another approved channel for detailed material. A church notice board should help readers choose an action, not display the entire office archive.

Our church calendar planning guide can help identify which events deserve current attention. A board becomes clearer when the team chooses a relevant time window instead of posting every planned activity at once.

4. Make each announcement answer the basics

A useful notice explains what is happening, who it is for, when and where it takes place, and what the reader should do next. Include a clear contact or registration route where needed. Avoid assuming that newcomers know an abbreviation or room nickname.

Write dates in an unambiguous form and check the day against the calendar. Include the year when it helps distinguish a future event from an old notice. A poster can remain visually attractive long after its information has become misleading.

Use the church poster guide when preparing individual announcements. Keep the main message readable and remove unnecessary wording. The board’s organisation cannot compensate for a notice that hides its date or action inside a dense paragraph.

5. Test readability in the real space

Print a sample and view it from the distance at which people normally approach the board. Check the heading, date and next action first. If these cannot be found quickly, simplify the layout or increase the readable emphasis rather than adding more decorative elements.

Consider contrast, glare and lighting at different service times. A notice that is readable in an office may be difficult behind reflective glazing or in a dim entrance. Test the finished arrangement instead of approving only a design on a bright computer screen.

Keep important information available in a suitable alternative format when needed. A QR code can supplement a notice, but it should not be the only way to learn the basic event details. Some readers may not have a phone, data connection or ability to use the code easily.

6. Assign an owner and an approval route

Name the person or team responsible for the church notice board. Clarify who approves new material and how notices are submitted. Without ownership, people may add overlapping posters while nobody feels authorised to remove expired ones.

Use a short submission form: title, approved wording, event date, contact, display start and removal date. Add the name of the person responsible for the activity. This gives the board owner enough information to manage the notice without chasing several separate messages.

For shared responsibilities, use the church office handover guide. The next volunteer should know which notices are pending, which need removal and which details are awaiting confirmation. A visible routine is more reliable than an informal promise to remember.

7. Review the board every week

Choose a regular review time before the main service or other busy period. Remove expired material, check upcoming dates and replace damaged copies. Verify that contact routes and registration instructions remain current, especially when an event changes.

Keep the review simple enough to complete consistently. A five-item checklist might cover current dates, readable print, correct placement, available space and removal of superseded notices. The goal is dependable maintenance, not a lengthy administrative exercise.

Record significant changes when necessary, such as a moved venue or cancelled event. Update other approved communication channels too. Correcting the church notice board alone may leave members relying on an old message elsewhere.

8. Ask readers whether it works

Invite a few visitors, members and volunteers to find ordinary information on the board. Ask where they looked first and what was unclear. Avoid leading questions such as “Isn’t this much better?” Specific tasks produce more useful feedback.

Observe repeated questions at the welcome point. If people still ask about an event displayed prominently, check whether the notice answers the question they actually have. The missing detail may be accessibility, registration or who the activity is intended for.

Review the layout after a month and keep the changes that help. A church notice board should evolve with its users, but frequent redesign without evidence can make it harder to recognise. Improve the information and routine before replacing the whole visual system.

A notice submission template

Use this format for a new announcement: “Event or information title; intended audience; date and time; location; action required; approved contact; display from; remove after; responsible person.” Keep the form short enough that organisers will complete it before asking for printing.

Add a confirmation line: “The organiser has checked the date, venue and contact details.” This does not replace the board owner’s review, but it establishes that someone responsible has verified the essentials. Do not ask the printer or volunteer to guess missing information.

For an illustrative notice, write: “Community Welcome Afternoon. Saturday, 14 November 2026, 2:00 pm, Main Hall. New visitors and their families are welcome. Ask the church office for registration details.” This is sample wording, not an announcement of a real event.

Separate public notices from private information

A public church notice board is not an appropriate place for internal records simply because they need attention. Review material before display and avoid exposing private contact details, personal requests or other information without the appropriate permission and purpose.

Use an approved office contact for general questions where possible. If a named organiser’s details are included, confirm that the person has agreed to their public use. Keep public announcements separate from confidential office or pastoral communication.

When a notice involves photographs, names or other personal details, follow the church’s applicable policies and obtain appropriate guidance where needed. The board owner should know whom to consult instead of making an uncertain decision under pressure just before a service.

Compare physical board options

Pinboards, magnetic boards, enclosed displays and printed panels offer different ways to update information. Compare them against your intended location, update frequency and care routine. The cheapest option may be inconvenient if it is difficult to open or maintain.

Ask the supplier for usable display dimensions, mounting requirements and included accessories. Check whether the quoted size refers to the whole frame or the available notice area. A large border can reduce the space you expected to use.

For an enclosed board, test opening and closing during the demonstration. Confirm how access is managed and whether replacement parts are available. The product should support the weekly routine rather than create a situation where only one unavailable person can update it.

Budget for more than the frame

Include suitable installation, printing, approved accessories and routine replacement of damaged notices in the plan. Request an itemised quotation and identify exclusions. A board that is inexpensive to buy can still be costly to fit if the wall or location needs work.

For illustration, a board priced at KSh 8,000 plus KSh 1,500 installation and KSh 500 initial printing has an initial total of KSh 10,000. These are hypothetical figures for comparison, not current market prices.

Avoid paying for a larger board before deciding what belongs on it. Better selection and clearer notices may solve the problem with the existing space. Trial the content arrangement first, then buy a product that supports the proven requirement.

Connect the board to the welcome team

The welcome team should know what is displayed and where to direct people for more detail. A brief review before a busy service can help volunteers answer consistently. Do not expect them to interpret a newly posted notice they have never seen.

Our church welcome team guide can help define that role. The board handles common information, while people provide a personal welcome and help with questions that need conversation. The two should support each other.

Give volunteers a simple route for reporting unclear or outdated content. A message to the named board owner is better than removing material informally without telling anyone. Clear ownership makes correction quicker and avoids disagreements about what should remain displayed.

Plan for changes and cancellations

Keep an editable source file and a record of where each important notice has been displayed. If an event changes, the team can update the physical board and other approved channels without rebuilding the artwork from a photograph.

Make a correction clear enough that someone who read the earlier notice understands what changed. Do not quietly replace a time while leaving the rest of the communication unchanged. Ask the organiser how affected participants will be informed directly where appropriate.

After cancellation, remove obsolete registration instructions and retain only the approved update for the necessary period. A cancelled-event poster left indefinitely can create as much confusion as the original outdated notice.

Frequently asked questions

How many notices should a church notice board display? Use the number that can be read and maintained clearly within the available space. There is no universal ideal. Prioritise current essential information and use other channels for detail that does not need permanent display.

Should every department have a section? Only if the arrangement helps readers. Department-based sections can become uneven or crowded. Grouping by time or action may be easier for visitors who do not know the church’s internal structure.

Is a digital screen better than a physical board? It depends on the location, audience, update process and support available. A screen still needs accurate content and an owner. Choose the format the church can maintain reliably rather than assuming newer equipment solves a communication problem.

Keep information current and easy to find

A useful church notice board has a clear purpose, a readable layout and a dependable review routine. Start with the questions people ask, assign ownership and test the information in the real space. Small consistent updates often improve communication more than a costly redesign.

Other websites to explore

Additional websites: prim.co.ke, zama.co.ke, vega.co.ke, awasa.co.ke, saseni.com, jaat.co.ke, tas.co.ke, dereva.co.ke, zes.co.ke.
Church Offering Envelopes: 8 Easy Checks for Clear Records

Church offering envelopes should make a simple action easier to understand and record. When the wording is crowded, the purpose is unclear or the office uses several conflicting versions, volunteers spend time interpreting information that could have been collected more clearly. A useful envelope starts with the church’s established process and includes only the fields needed for that process.

This guide explains how an administrator can plan church offering envelopes, proof a sample and organise their distribution. It focuses on practical stationery and record handling rather than accounting, tax or legal advice. The church’s authorised finance team should approve the workflow and resolve policy questions. Use the examples as starting points, adapting them to the procedures your church has actually adopted.

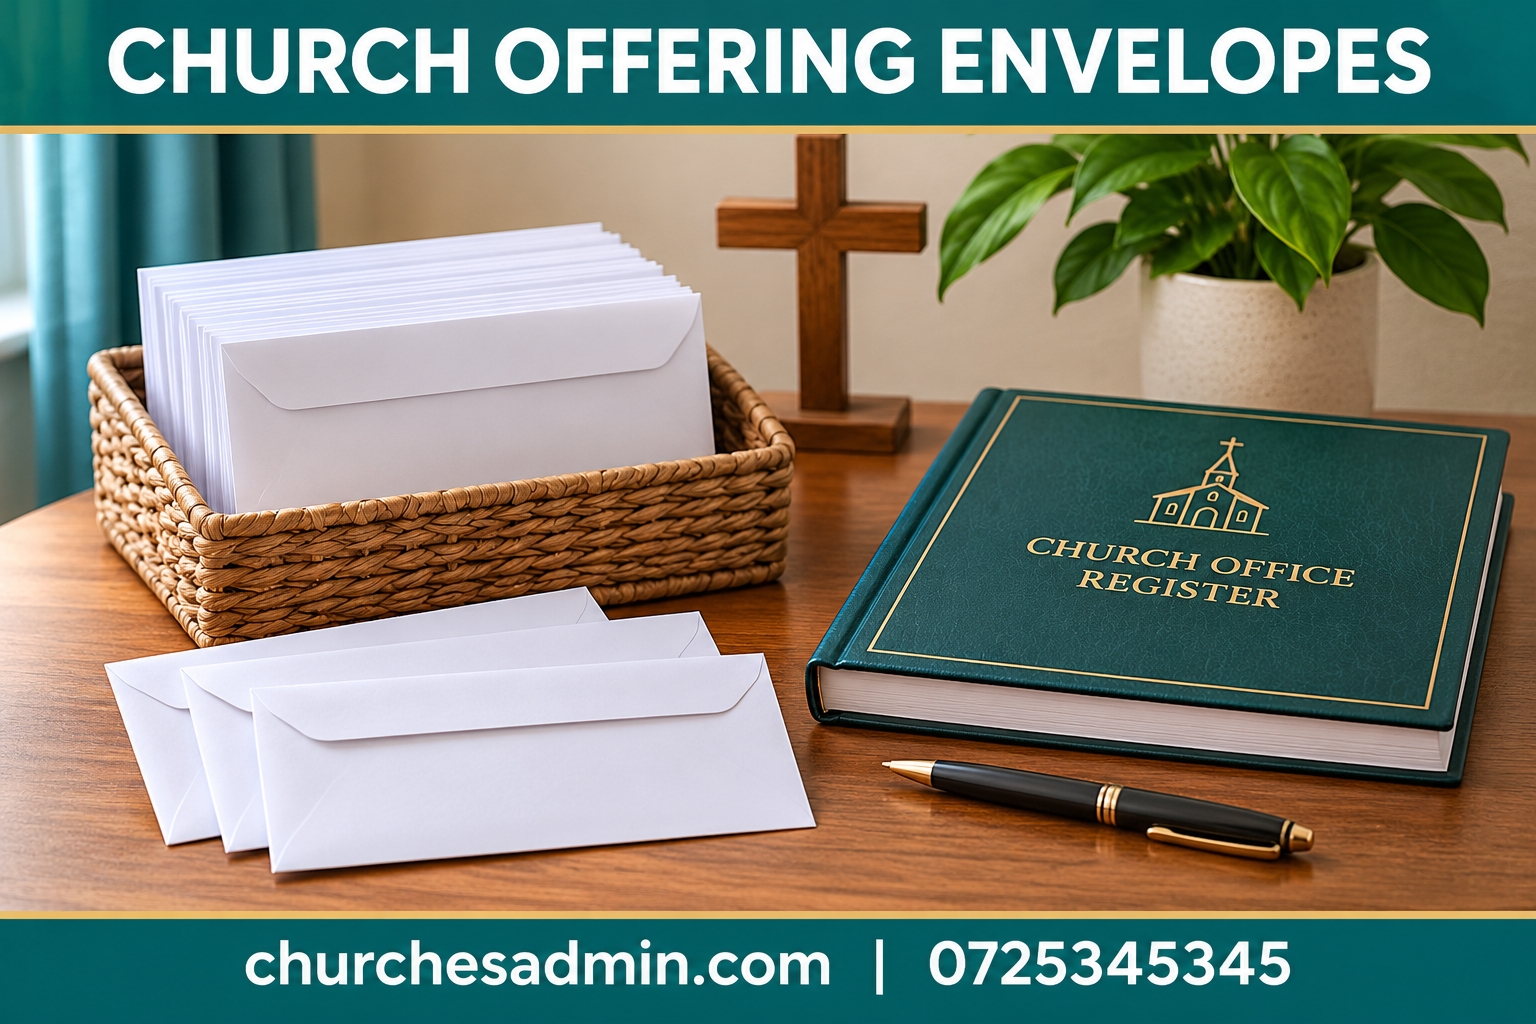
church offering envelopes planning illustration
Church Offering Envelopes | churchesadmin.com | 0725345345

1. Define the purpose before designing

Decide whether the envelope is for a general offering, a specific approved project or another established category. Use wording that matches the church’s own records. If the printed category differs from the office terminology, volunteers may need to interpret the donor’s intention later.

Ask the authorised finance team which information is necessary and why. Avoid adding fields simply because another church’s envelope includes them. Each extra field makes the design busier and creates another piece of information that must be handled appropriately.

Keep temporary campaigns separate from permanent stationery where practical. A dated project envelope may be useful for a defined event, while a general envelope should remain understandable afterward. Record who approves the wording and when the design should be reviewed.

2. Use clear fields on church offering envelopes

A simple starting layout might include the church name, date, offering category, amount and an optional identifier where your approved process uses one. Whether a name or other detail is required should be decided by the church’s policy, not assumed by the designer.

Give people enough space to write legibly. Print labels in plain language and avoid abbreviations that only long-serving members understand. A newcomer should not need to ask several questions before using the stationery.

Use the church communication plan guide to keep the terminology consistent across announcements, forms and office records. Clear wording reduces avoidable questions and makes volunteer training easier.

3. Separate instructions from decoration

The most important information should be easy to find at a glance. Use a readable typeface, suitable contrast and enough blank space around fields. Decorative backgrounds should not interfere with handwriting or make photocopied examples difficult to understand.

Keep the approved church identity visible without allowing it to dominate every surface. Our church logo guide explains how to manage artwork consistently. Give the printer the approved file rather than a compressed screenshot copied from a message.

Avoid adding a long paragraph of instructions to a small envelope. If the process needs explanation, provide a separate approved notice or ask the welcome team to direct questions appropriately. The envelope itself should support a straightforward action.

4. Proof the actual printed sample

Ask for a physical proof before a large print run. Fill it in using an ordinary pen and review it under typical room lighting. Check whether the fields remain readable after normal handling and whether important information is placed near folds or closures.

Have at least two authorised reviewers check the church name, category wording and any contact or payment information. Verify details against the church’s current approved records. Do not rely on a designer’s memory or on an old envelope that may contain outdated information.

Keep the signed-off proof with the order. If the printer changes paper, size or layout, review the revised sample before production. A digital preview can be useful, but it does not answer every question about the finished item.

5. Plan distribution without confusion

Decide where church offering envelopes will be available and who replenishes them. Use a location that fits the church’s service process and is easy to identify. Avoid placing several almost identical versions together without clear labels.

Tell the welcome and service teams which envelope is current and how to answer routine questions. The church usher duties guide can help align that responsibility with other tasks. Volunteers should know when to refer a question to the authorised finance team.

If a special event uses different stationery, record its start and end date. Remove or separate unused temporary stock afterward according to the church’s process. Leaving old project envelopes mixed with general stock can create unnecessary uncertainty.

6. Agree the office handover

The authorised finance team should define how completed envelopes move through the church’s established collection and recording process. The administrator’s design work should support that process, not quietly introduce a different one.

Clarify who receives stock, who maintains the print record and who reports unclear fields or recurring mistakes. Keep responsibilities specific. A stationery change is easier to manage when someone owns the follow-up rather than assuming the whole team will notice problems.

Use the church volunteer training guide for a short practical briefing. Demonstrate with fictional information only. Real names, contributions and other private details should not be displayed in general training material.

7. Order a practical quantity

Review actual use over a representative period before choosing a print quantity. Consider ordinary services, approved events and the time needed for replenishment. A lower unit price on a very large order may not be worthwhile if wording is likely to change.

Keep a simple stock record showing quantity received, location and replenishment point. Separate unused stationery from completed records. The two categories serve different purposes and should not be stored together merely because they share the same physical format.

For a new design, begin with a manageable pilot run where practical. Use feedback to correct unclear wording before committing to a larger batch. A small improvement made early can prevent the same problem from appearing on thousands of envelopes.

8. Review church offering envelopes after use

Ask authorised staff which fields were repeatedly unclear, missed or misunderstood. Focus on patterns rather than criticising individual handwriting. The design may need more space, simpler labels or a clearer distinction between categories.

Review the process as well as the print. If people use the wrong envelope, the distribution point or announcement may be the issue. If volunteers interpret a field differently, the team may need an agreed explanation rather than another decorative redesign.

Document approved changes and identify the new version clearly. Keep one reference copy and remove superseded stock from ordinary distribution according to the church’s process. This prevents different versions from circulating without anyone knowing which is current.

Sample wording to adapt

A basic fictional example could read: “Community Church — Offering Envelope. Date: ____. Approved category: ____. Amount enclosed: ____. Optional member reference, where used: ____.” This is a layout example, not a requirement to collect those exact fields.

If a project has approved wording, keep it concise: “Building Project — November Collection.” Include only information confirmed by the responsible team. Do not add promises about how money will be used unless they match the church’s authorised communication.

Avoid printing an individual’s private contact details merely because that person helped organise the event. Use an approved office contact if one is needed. The stationery should remain usable when volunteers or office roles change.

Create a reliable print order

The printer’s brief should identify the final artwork version, size, paper, quantity, colour requirements and delivery date. Ask for a proof and a complete quotation before authorising production. Record any agreed changes in one place.

Compare delivered cost rather than unit price alone. For illustration, 1,000 envelopes at a hypothetical KSh 5 each cost KSh 5,000. Adding KSh 500 delivery makes the total KSh 5,500. These are arithmetic examples, not current printing prices.

Ask what happens if the delivered batch differs from the approved proof. Clarify the process for reporting printing defects or missing quantities. Keep the quotation, proof, invoice and delivery record together so follow-up does not depend on searching old conversations.

Keep the records process proportionate

A stationery design should collect only information that the church has a clear purpose and approved process for handling. More fields do not automatically produce better records. They can create unnecessary work and make an envelope harder to complete.

Discuss access and storage with the responsible church team. Completed envelopes may contain private information and should not be left in public areas or used as casual examples in meetings. Follow the church’s applicable policies and obtain appropriate professional advice where legal or accounting requirements are uncertain.

When an error is identified, use the authorised correction process rather than overwriting information informally. The administrator should help staff locate the correct procedure, not invent a new financial control through a stationery guide.

Coordinate envelopes with other communication

An envelope is one part of a wider message. Announcements, posters and office instructions should use the same approved category names and dates. Conflicting wording can create confusion even when each item looks professional in isolation.

If the church uses digital giving alongside envelopes, have the authorised team explain the relationship clearly. Do not assume an envelope should duplicate a digital record or that one process replaces another. The design should reflect the church’s actual reconciliation arrangements.

Keep changes visible to the people who answer questions. A short briefing before a new print run is distributed can prevent repeated explanations during a busy service. Record where the current approved wording is stored so future designers can find it.

A one-page review checklist

Before printing, confirm the purpose, approved category names, necessary fields, readable type, adequate writing space and correct identity artwork. Check any contact or payment details independently against current authorised records. Have the responsible team approve the final proof.

Before distribution, confirm the stock location, responsible person, current version and volunteer explanation. Ensure temporary campaign stationery is clearly distinguished from general envelopes. Use fictional examples in training and keep completed records within the approved process.

After the pilot, review recurring questions, missing fields and print quality. Record what will change and who approves it. Keep the process short enough to repeat whenever the design is revised, rather than treating the first approval as permanent.

Frequently asked questions

Should church offering envelopes include names? That depends on the church’s approved purpose and records process. Do not add a mandatory name field by default. Ask the authorised team what is needed and explain optional fields clearly where they are used.

Is a numbered envelope always better? Numbering may support some established systems, but it also requires a clear process for issuing and maintaining references. Use it only when the responsible team has agreed how it works and why it is needed.

Can we reuse an old design? Review every field and printed detail before reprinting. Dates, category names, identity artwork or contact information may have changed. An old file is a starting point, not evidence that the content remains current.

How many colours should we use? Choose a design that remains readable and practical within the budget. Additional colours are useful only if they improve understanding or approved identity. Test the actual proof rather than assuming a more colourful envelope is clearer.

Make the stationery support the office

Well-designed church offering envelopes are easy to understand, easy to proof and consistent with the church’s approved records process. Start with purpose, keep fields clear and review a small run before ordering heavily. The goal is dependable stationery that helps people and volunteers complete an ordinary task confidently.

Explore ChurchesAdmin when reviewing how your office manages giving records and related administration. Bring the current approved process to a demonstration and ask how it would be represented. Software and printed stationery should support the same agreed workflow rather than create competing records.

Keep one unused approved envelope with the print record. When ordering again, compare the new proof with that reference and the latest authorised wording. This small check helps the office spot unintended changes before a replacement batch enters circulation.

Other websites to explore

Additional websites: prim.co.ke, zama.co.ke, vega.co.ke, awasa.co.ke, saseni.com, jaat.co.ke, tas.co.ke, dereva.co.ke, zes.co.ke.
Church Sound System: 8 Smart Planning Steps Before Buying

A church sound system should help people hear the service clearly. Buying more equipment does not automatically solve unclear speech, uneven coverage or a difficult volunteer handover. Before comparing packages, define what happens in the room, who operates the system and which problems need attention. That brief gives a qualified audio professional something useful to assess.

This guide is for church administrators planning a purchase or review, rather than a technical installation manual. It covers the room survey, equipment inventory, supplier demonstration, quotation and training. Electrical work, mounting and specialist audio design should be handled by appropriately qualified people. The church’s role is to organise the requirements, ask clear questions and verify the agreed outcome.

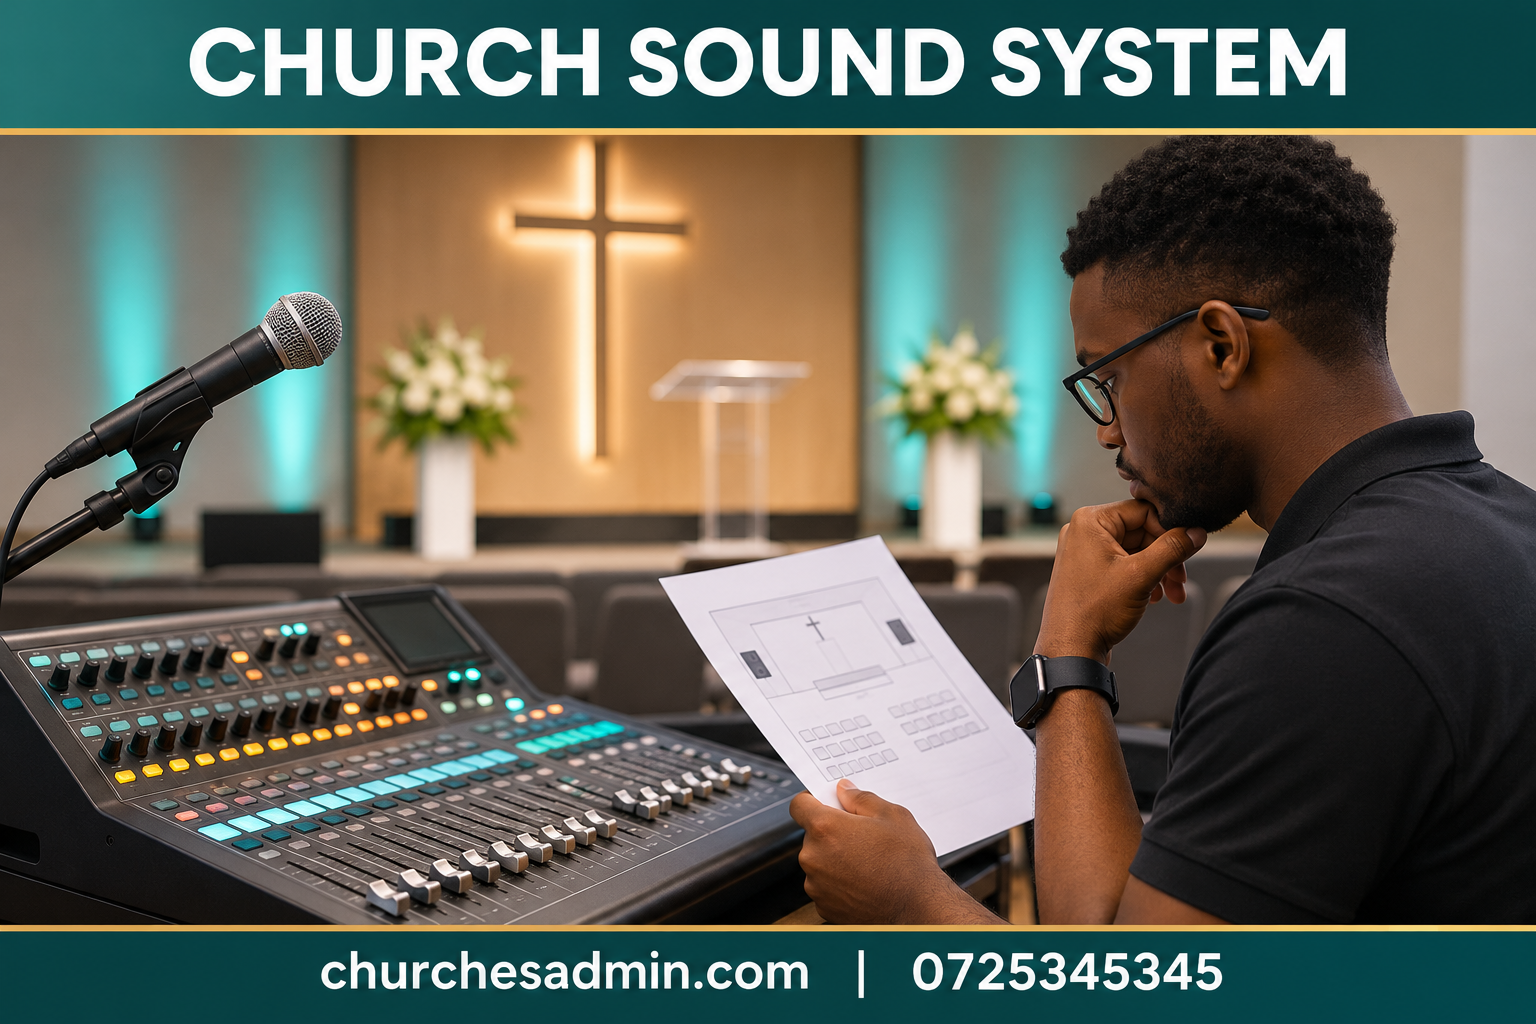
church sound system planning illustration
Church Sound System | churchesadmin.com | 0725345345

1. Describe the church sound system’s purpose

List the activities the system must support: spoken readings, sermons, singing, instruments, recorded material and any existing recording or streaming workflow. Identify which are essential now and which are possible future needs. Avoid buying for an imagined large production when the immediate problem is understandable speech.

Write the current problems in observable terms. “People at the back cannot follow announcements” is more useful than “the speakers are weak.” Note when the problem occurs and where listeners are seated. Those details help a professional distinguish between equipment, room, positioning and operating issues.

Use the church service planning guide to map the sequence. A service may involve several speakers and quick transitions. The sound team needs to know that sequence before recommending how many inputs, microphones or operating steps are actually required.

2. Request a room assessment

Ask a qualified audio professional to visit the room rather than recommending a package from attendance numbers alone. Share the layout, seating arrangements, typical activities and any known constraints. The room’s shape and surfaces can affect the result, so equipment selection should follow assessment.

Include the people responsible for the building and service operation in the visit. They can explain access, storage, available services and how the room changes during the week. If the hall is rearranged for classes or community events, that should be part of the brief.

Ask the professional to explain findings in plain language. Request a written scope describing the problem, proposed work and expected result. Avoid accepting an equipment list without understanding why each item is included and which part of the original problem it addresses.

3. Inventory what the church already owns

Record existing equipment by model, condition, location and intended use. Include microphones, cables, stands, mixers, speakers and accessories where present. Do not assume that an old item is unusable or that a recently purchased item must remain in the final design.

Have uncertain condition or compatibility assessed by the appropriate professional. The church sound system may benefit from reusing suitable components, but decisions should be based on evidence. A mixed collection of donated items does not automatically form a compatible or manageable setup.

Keep the inventory with the church asset register. Record serial numbers where available and identify who holds the manuals and support information. This makes future servicing and replacement less dependent on one volunteer’s memory.

4. Design for the actual operators

List who operates the system and how often they do so. A solution that works well for one specialist may be difficult for a rotating volunteer team. Ask the supplier to demonstrate ordinary operation using the kinds of tasks those volunteers will perform.

Consider the handover between services. Can the team identify the normal starting arrangement, understand what changed and restore the approved setup? Request clear labels and appropriate documentation as part of the installation rather than treating them as an optional extra.

Avoid assuming that more controls mean more useful capability. The right church sound system is one the team can operate reliably within its training. Discuss future expansion, but keep the everyday service workflow understandable to the people responsible for it now.

5. Arrange a meaningful demonstration

Test the proposed arrangement with representative speech and service material under the professional’s supervision. Listen from several areas of the room. Ask whether words are understandable and whether the experience is consistent enough for the intended use, rather than judging only how loud it can become.

Include the real operating team in the demonstration. Have them perform a normal transition, such as moving between two speakers, following the supplier’s instructions. Note confusing steps and ask for changes or additional training where appropriate.

Record the conditions of the test. An empty-room demonstration may not reflect every occupied service, so ask the professional how the design accounts for normal use. Do not treat one impressive song or short microphone test as proof that every requirement has been met.

6. Compare complete church sound system quotations

Request an itemised quotation with exact models, quantities, installation, approved mounting, cabling, configuration, documentation and training. Ask which existing equipment will be retained and which will be replaced. The scope should be clear enough that different offers can be compared fairly.

Keep exclusions visible. One quotation may include professional installation and volunteer training while another covers only boxed equipment. A lower initial figure is not necessarily a lower completed cost. Ask how changes discovered during the site work will be proposed and approved.

Use the church budget planning guide to connect the project with the wider budget. Avoid spending the full allowance on equipment while leaving no provision for essential installation, support or agreed training.

7. Agree commissioning and training

Before work begins, define how the completed system will be checked against the brief. Ask for a supervised demonstration of the required service tasks and a clear explanation of any limitations. Document outstanding items rather than treating delivery of boxes as completion.

Request training for more than one responsible person where possible. The church should not become dependent on a single volunteer being present every week. Keep the training focused on approved normal operation, reporting faults and recognising when professional help is needed.

Have the provider supply manuals, configuration records where appropriate, support contacts and warranty information. Store these securely and make them accessible to the authorised team. Any access credentials should be managed through the church’s approved process rather than displayed in a public instruction sheet.

8. Review the first services

Collect brief feedback from operators, service leaders and listeners in different parts of the room. Ask specific questions about clarity and transitions. General praise or frustration is less useful than knowing which part of the service worked or caused difficulty.

Use the church volunteer training guide to turn early observations into practical follow-up. If operators repeatedly struggle with the same step, review the instructions and training rather than assuming they simply need to try harder.

Follow up with the provider on issues covered by the agreed scope. Record the date, circumstances and action taken. A structured review helps distinguish an installation concern from a changed service requirement that needs a separate discussion.

A supplier brief you can adapt

Begin with the purpose: “We need a church sound system that supports clear speech and our current service activities in the attached room layout. Please assess the room and existing equipment before recommending replacements. Our operating team consists of trained volunteers with varying experience.”

Describe the process: “The proposal should identify the problem being addressed, equipment retained, new components, installation requirements, training and support. We need a demonstration using representative service tasks and a written explanation of any limitations.”

Finish with the handover: “Please include manuals, normal operating guidance, equipment references and a support contact. The project will be reviewed against the agreed scope after installation and during the first services.” Adapt the brief to your needs and the provider’s actual agreement.

Avoid common purchasing shortcuts

Do not choose a church sound system solely by advertised power, speaker size or the number of channels. Those figures may describe products but do not establish suitability for your room. Ask the professional to connect each specification to a real requirement.

Avoid copying another church’s equipment list without reviewing differences in room, programme and staffing. A system that works well elsewhere can still be a poor fit for your building. A visit to another venue is useful for questions, not a substitute for your own assessment.

Treat donated or discounted equipment with the same care as a purchase. Ask whether it is suitable, serviceable and compatible with the proposed design. An apparently free component can create installation or support costs that were not included in the original plan.

Keep the weekly handover simple

Create a short approved checklist for the operating team. It should identify the normal setup, service information needed in advance, responsible person and fault-reporting route. Technical sequences should come from the provider’s instructions and training, not from guesses copied between volunteers.

Ask service leaders to communicate planned changes early. A visiting speaker, additional instrument or recorded presentation may require preparation. Last-minute surprises are easier to manage when the team knows who can approve changes and who should be consulted.

The church communication plan guide can help define that handover. Keep operational messages focused: what is changing, when it is needed and who owns the next action. Avoid scattering important instructions across unrelated conversations.

Plan for faults and unavailable equipment

Agree how staff or volunteers report an issue and who decides whether equipment should be taken out of use. Follow manufacturer guidance and obtain qualified help for uncertain faults. Do not encourage improvised electrical repairs or changes to mounted equipment.

Prepare a realistic service alternative with the leadership team. That might involve changing the programme or using an approved existing arrangement, depending on the circumstances. The plan should reflect what the church can actually do, not an assumption that a replacement will arrive immediately.

Keep a fault record with the model, date, observed issue and support response. Over time, it can show whether recurring problems need a different maintenance arrangement, further training or a revised design. It also gives service personnel useful context.

Budget examples without misleading price claims

For comparison, imagine a proposal listing equipment at KSh 120,000, installation at KSh 20,000 and training at KSh 10,000. The initial project total is KSh 150,000 before any other stated charges. These are hypothetical figures used to demonstrate arithmetic, not a market price or recommended package.

Compare that complete scope with another offer on the same basis. If the second offer excludes mounting or configuration, ask for those costs before deciding. Record the validity period, payment terms and what evidence of completion is expected.

Avoid estimating financial returns from attendance increases that have not been demonstrated. The project should be justified by its actual purpose, such as clearer communication, reliable operation or replacement of unsuitable equipment. Those outcomes can be reviewed directly after installation.

Frequently asked questions

Should a small church buy a digital mixer? That depends on the service requirements, operating team and professional assessment. Do not choose a category simply because it is newer. Ask for a demonstration of the real tasks and compare training and support needs.

Will larger speakers fix unclear speech? Not necessarily. The cause may involve several factors that require assessment. Describe the listening problem and have the room and setup reviewed before buying more equipment.

Can volunteers install the system? Routine use after training is different from electrical work, structural mounting or specialist design. Use appropriately qualified people for those tasks and clarify responsibilities in the project scope.

How often should the church upgrade? Review actual needs, condition and support rather than following a fixed trend cycle. A well-maintained suitable system may continue to serve the church, while recurring problems deserve investigation regardless of age.

Make clarity the measure of success

A good church sound system project starts with a clear problem and ends with a usable, documented handover. Assess the room, involve the operators, compare complete scopes and review real services afterward. That process gives the church a stronger basis for a purchase than a list of impressive specifications.

Other websites to explore

Additional websites: prim.co.ke, zama.co.ke, vega.co.ke, awasa.co.ke, saseni.com, jaat.co.ke, tas.co.ke, dereva.co.ke, zes.co.ke.

Church Pulpit: 7 Smart Checks Before You Commission One

A church pulpit is a working piece of furniture as well as a visible part of the worship space. It needs to support the people who speak from it, the material they read and the room around them. A design chosen only from a photograph can look impressive while making notes difficult to see or leaving little space for ordinary movement.

This church pulpit guide helps an administrator, leadership team or furniture maker work from a clear brief. It covers the users, platform, materials, quotation and handover. The purpose is not to prescribe one design for every tradition, but to help the church choose furniture that fits its own service practices and building without avoidable surprises after delivery.

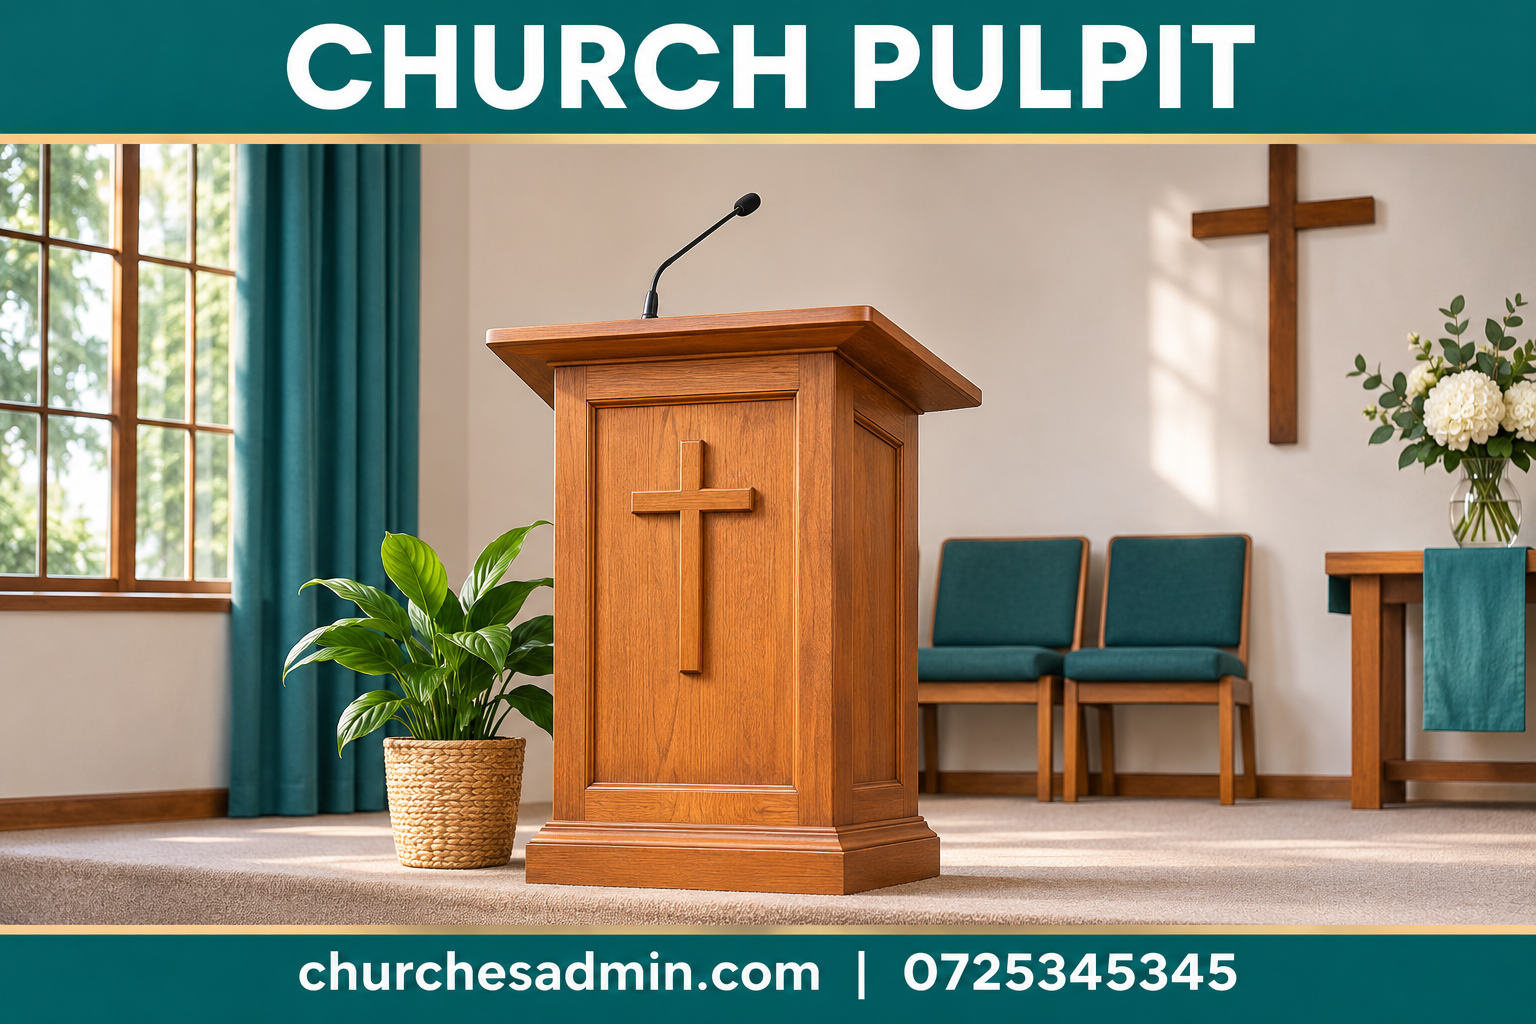
church pulpit planning illustration
Church Pulpit | churchesadmin.com | 0725345345

1. Agree what the church pulpit needs to do

Begin with the people who use it and the tasks they perform. Some speakers read from a large book, others use printed notes or a tablet, and some need room for several items. List those requirements before discussing decorative details or copying a design from another congregation.

Clarify whether the church needs a pulpit, a movable lectern or another arrangement. Those terms are sometimes used loosely in product listings. Explain the intended use to the maker and ask them to describe the proposed design in practical terms, including whether it is fixed or moved between services.

Involve the relevant leaders early. The church leadership roles guide can help clarify who provides input and who approves the purchase. A design can become expensive to revise if the people responsible for worship practice see it only after manufacture.

2. Test the reading surface and height

Create a temporary mock-up before commissioning a custom church pulpit. Use a stable existing surface or a supplier’s sample and the books or devices speakers actually use. Ask different users to try the arrangement and describe what they can see and reach comfortably.

Check the usable surface, not only its outside dimensions. A raised edge, decorative feature or microphone position may reduce the space available for notes. Test turning pages and placing items down without overcrowding the area. Keep liquids and electronic equipment arranged according to appropriate care and safety practices.

Where an adjustable design is proposed, ask the maker to demonstrate its intended operation and limits. Do not rely on a vague promise that it will suit everyone. Record the agreed range and method of adjustment, and consider a suitable alternative for users whose needs are not met by the standard arrangement.

3. Review sightlines from the room

Place the mock-up in the proposed location and view it from several seating areas. Check whether people can see the speaker clearly and whether the furniture blocks something important. Ask the service team to assess the arrangement during ordinary use rather than judging an empty platform alone.

Consider cameras or projection equipment if they are part of the church’s existing service setup. The aim is a clear view and practical operation, not a purchase based on an imagined future system. Have the responsible team identify any genuine constraints before the design is approved.

Use the church service planning guide to consider transitions between readers, speakers and other participants. A church pulpit should support that sequence without forcing awkward crossings or last-minute furniture movements.

4. Plan movement, access and installation

If the pulpit will move, ask how it is intended to be handled and stored. Record its dimensions and the route through doors or around other furniture. Do not assume that volunteers can lift or roll it safely simply because the seller calls it portable.

For a fixed installation, obtain appropriate professional assessment of the location and fixing requirements. Ask who is responsible for installation and what checks are included. Avoid improvised alterations after delivery, especially where they affect stability or the surrounding platform.

Consider the people who approach and use the area. Access needs should be discussed respectfully with those affected and addressed through a suitable arrangement. A single raised or fixed position may not work for every participant, so include alternatives in the service plan where necessary.

5. Compare materials through practical questions

Wood, metal, acrylic and mixed-material designs can create different appearances and care requirements. Rather than treating one material as automatically superior, ask how the exact product is constructed, cleaned, moved and repaired. Request a sample finish where appearance is important.

Check for glare under the room’s normal lighting. A finish that looks attractive in daylight may reflect strongly during an evening service or on camera. Test the actual material where possible. Ask the maker which cleaning products are suitable and how scratches or damage should be addressed.

Think about the wider visual identity without making the pulpit carry every message. Our church logo guide can help with consistent use of an approved mark. Confirm permission and artwork quality before permanently applying a logo or other identifying design.

6. Give the maker a complete church pulpit brief

Provide the intended use, measured location, required reading space, preferred finish and movement requirements. Include photographs and an approved sketch. Ask the maker to identify dimensions clearly and show how any storage, microphone provision or adjustable feature will work.

Separate essential requirements from optional decoration. A reliable reading surface and suitable positioning may be essential, while a particular trim or carved detail may be optional. This distinction helps the maker propose alternatives if the first design exceeds the budget.

Agree how changes will be handled before work begins. A drawing revision should be identified and approved, not discussed vaguely in a series of messages. Keep the final specification with the quotation so that the delivered church pulpit can be checked against one clear version.

7. Inspect and hand over the finished pulpit

On delivery, verify the model or approved design, dimensions, finish and included components. Record visible damage or differences promptly. If installation is included, have the responsible professional complete and explain it before the furniture is placed into regular use.

Ask the people who will use the pulpit to repeat the practical trial. Check reading space, visibility and ordinary movement. A final inspection should test the agreed purpose rather than only confirm that the colour matches the sample.

Keep care instructions, warranty information, maker details and approval records together. Add the item to the church asset register with its location and responsible person. That record remains useful long after the original purchasing team changes.

A sample commission brief

Start with a short purpose statement: “The church pulpit will be used for readings, announcements and sermons in the main worship room. It must support our usual book and notes, and its position must preserve the agreed sightlines and access arrangements.”

Then describe what needs verification: “The maker should provide a measured drawing, material sample, total delivered quotation and installation requirements. Any proposed microphone provision or adjustable mechanism must be demonstrated or explained in writing before approval.”

Finish with the acceptance process: “We will compare delivery against the approved drawing and trial the furniture with its intended users. Substitutions and design changes require agreement before manufacture. Please supply care instructions and a clear contact for reporting faults.” Adapt this to the actual agreement rather than treating it as a legal contract.

Keep the budget transparent

Ask for an itemised quotation covering manufacture or purchase, finishing, delivery, installation and any approved accessories. Record taxes and exclusions clearly. A quotation for an unfinished item should not be compared directly with a delivered and installed price.

Use hypothetical arithmetic to test the comparison. If a pulpit is quoted at KSh 35,000, finishing at KSh 5,000 and delivery at KSh 3,000, the initial total is KSh 43,000. These figures are examples, not current market prices or a suggested budget.

Keep a brief decision record explaining why the selected option fits the church. Note any unresolved conditions, such as approval of the final finish sample. This helps leaders account for the purchase and prevents optional changes from being mistaken for already approved work.

Coordinate microphones and other equipment

Ask the sound team to review the proposed arrangement before the pulpit is made. They can identify where existing equipment needs access and whether the design interferes with ordinary setup. Avoid drilling or attaching components after delivery without the maker’s and relevant professional’s guidance.

Keep cable routes planned and unobstructed. Any electrical work belongs with a qualified person. Do not rely on loose leads stretched across the platform to make a design functional. The sound team’s needs should appear in the brief early enough to be considered properly.

Test the actual service sequence with the existing equipment. A speaker may place a book differently from a reader, and an adjustable microphone may need a clear range of movement. Small practical details can matter more than decorative features that nobody interacts with during the service.

Separate permanent identity from changing announcements

A church pulpit normally serves many occasions. Avoid permanently adding a dated theme or temporary campaign message unless the church has deliberately chosen that use. A neutral long-term design can be supplemented by suitable temporary communication elsewhere.

For changing notices, use the ideas in our church poster guide. Event information needs an update and removal process; it should not be fixed permanently to furniture simply because there is an empty panel available.

Where a temporary covering or display is proposed, check that it does not interfere with the pulpit’s intended use, controls or stability. Confirm suitable attachment methods with the maker. A seasonal presentation should be easy to remove without damaging the underlying finish.

Give users a short familiarisation session

Show readers and speakers where to place notes, how any approved adjustment works and where to report problems. Keep the explanation practical. A few minutes before a rehearsal is better than expecting someone to discover an unfamiliar feature in front of the congregation.

If the furniture is moved between activities, train the responsible team in the manufacturer’s handling method and storage arrangement. Identify who authorises relocation. This avoids a situation where several groups move the same item differently without knowing which method is intended.

Keep a simple handover note with the care instructions. Include the normal location, approved setup and contact for support. New volunteers should be able to find the information without relying on the memory of the person who originally received the delivery.

Review the first month of use

Ask users whether the reading surface, position and access work as expected. Observe a typical service and note any repeated adjustments or awkward transitions. These observations help separate a design issue from a one-time unfamiliarity with new furniture.

Follow up with the maker on specific concerns. Describe what happens, when and under which normal conditions. Reference the agreed specification where relevant. Avoid making unsupported alterations that may complicate the problem or affect the product’s intended use.

Record the final arrangement once issues are resolved. A photograph and short note can support future room planning. Review again when the platform layout or service equipment changes, rather than assuming that the original arrangement will suit every later addition.

Frequently asked questions

Is a larger church pulpit more suitable for a large room? Not necessarily. Size should follow reading needs, sightlines and the platform arrangement. A large unit can obstruct views, while a smaller well-positioned design may work effectively. Test the room rather than choosing by scale alone.

Should the pulpit be fixed or movable? That depends on the room’s activities and the design’s intended handling. A multipurpose space may benefit from movement, but the furniture and storage route must support it. Obtain suitable advice before changing a fixed installation.

Can we copy a photograph exactly? A photograph may inspire a brief, but it rarely supplies enough information about dimensions, construction or usability. Respect others’ design rights and ask the maker to develop a suitable original specification for your needs.

Choose furniture that supports the service

A church pulpit works best when its users, room and service sequence have shaped the design. Keep the brief practical, test a mock-up and document the final agreement. Those steps help the church make a purchase it can use and explain confidently.

Other websites to explore

Additional websites: prim.co.ke, zama.co.ke, vega.co.ke, awasa.co.ke, saseni.com, jaat.co.ke, tas.co.ke, dereva.co.ke, zes.co.ke.

Church Chairs: 8 Smart Checks Before a Bulk Order

Church chairs affect how people sit, move and use a shared building throughout the week. A chair that suits a short meeting may feel different during a longer service, while a model that looks attractive in one row may be difficult for volunteers to stack and store. A bulk order deserves a practical trial before the church commits to matching units.

This guide helps an administrator or purchasing team assess church chairs through eight checks. It covers use, layout, comfort, handling, supplier information and delivery. The aim is a clear decision that can be explained to leaders and volunteers, supported by observations rather than appearance alone. Adapt the process to your premises and obtain qualified advice for venue capacity and safety requirements.

church chairs planning illustration
Church Chairs | churchesadmin.com | 0725345345

1. Define how the church chairs will be used

List the activities held in the room: services, prayer meetings, classes, conferences and community events. Note whether the layout stays fixed or changes frequently. A multipurpose hall places different demands on furniture from a room used mainly for one weekly service.

Ask who moves and stores the chairs. The people responsible for setup may notice practical issues that a purchasing committee misses. Include their observations in the brief, especially where chairs are moved repeatedly, carried through doors or stored in a separate room.

Identify essential requirements before discussing colours. These may include suitable seating comfort, manageable handling, compatibility with the approved layout and documented care instructions. Decorative details can still matter, but they should not displace the requirements that determine everyday usefulness.

2. Confirm the layout before deciding quantity

Start with the room’s approved use and obtain appropriate professional guidance on capacity, access and exits. Do not calculate a chair order by filling every available patch of floor. A usable room needs circulation, access for different attendees and space for the activities taking place.

Create a measured plan showing seating blocks, routes, doors and other furniture. Test a small arrangement with sample chairs where possible. The outside dimensions of a chair matter, but the occupied layout matters more: people need to sit, stand and move without unnecessary obstruction.

Use the church service planning guide to coordinate the arrangement with the service sequence. A layout should support the actual programme, including entry, announcements and departure, rather than simply maximise the number shown on a purchase request.

3. Trial church chairs with different adults

Ask the supplier for a sample or demonstration before a large order. Invite consenting adults of different heights to try it for a realistic period. Gather specific comments about the seat, back support, ease of standing and overall fit. A quick touch of the upholstery is not a comfort test.

Include people who help set up the room in the trial. They should assess normal movement and handling according to the manufacturer’s instructions. Do not exceed stated limits or perform improvised strength tests. Ask for product documentation where a capacity or performance claim affects the decision.

Discuss access needs respectfully and plan suitable alternatives where necessary. One chair design may not work equally well for everyone. A church can aim for visual consistency while still providing arrangements that help different people participate comfortably.

4. Review construction and care information

Ask the supplier to identify the frame, finish, upholstery and other relevant materials. Obtain written cleaning guidance and understand what staff or volunteers may do routinely. Avoid assuming that a cleaning product used on existing furniture is suitable for a different fabric or finish.

Look at areas that will receive repeated handling: edges, feet, joints and contact points during stacking. Ask how wear or damage is reported and which parts can be replaced. A small component may be inexpensive but still difficult to obtain if the chair has no clear model identification.

Keep the sample reference with the quotation. Similar-looking church chairs may use different materials or construction. If the supplier proposes a substitute, review it against the agreed requirements before accepting it. A matching colour is not evidence that the product is otherwise equivalent.

5. Test storage and movement

Measure the storage route and the proposed storage area. Ask for the manufacturer’s stacking limits and approved handling method where stacking is supported. Do not invent a higher stack to make the order fit a small room. Storage should be planned around the documented design.

Consider whether handling equipment is needed and whether it is compatible with the chair. Check thresholds, corners and doors along the route. A demonstration on an open showroom floor may not reveal the difficulties of your actual building.

Assign a storage location and a responsible team before delivery. Link the purchase to the church asset register guide so the church can record quantities, condition and location. A clear register helps when furniture is moved between rooms or borrowed for an event.

6. Compare complete quotations

Request the exact model, quantity, finish, delivery, assembly if needed and applicable taxes in writing. Ask how long the quotation is valid and what changes if the order is split into stages. Keep each supplier’s exclusions visible on the comparison sheet.

For illustration, 100 chairs at a hypothetical KSh 2,000 each cost KSh 200,000 before other charges. Delivery of KSh 10,000 makes the initial total KSh 210,000. These are arithmetic examples, not current prices. Use actual quotations for the church’s decision.

Consider timing, replacement availability and support alongside the total. A bulk discount is not useful if the delivered chairs do not match the tested sample or arrive after the event for which they were ordered. Write down the reasons for choosing an offer so the decision remains clear later.

7. Agree delivery and acceptance checks

Plan who will receive the order and where the chairs will be inspected. Compare the quantity and model against the purchase record. Check for visible transport damage and record differences promptly using the supplier’s procedure. Avoid signing a blanket statement that everything is satisfactory before inspection.

For a large delivery, use a systematic count and inspection record. Identify cartons or groups so that an issue can be traced. Keep photographs focused on the product and avoid including private information unnecessarily. Store delivery documents with the quotation and approval.

Agree how defects, missing units or substitutions will be resolved. The administrator should know whom to contact and what evidence is required. A verbal promise made during unloading is harder to follow up than a clear written record linked to the order.

8. Review the first services after installation

Ask the welcome and setup teams what they observe. Are people finding the layout clear? Can volunteers move chairs as intended? Are storage arrangements working after the room is reset? Record practical issues before they become habits.

Use the church usher duties guide to align the seating plan with the welcome team’s responsibilities. Furniture alone does not create a smooth arrival; the team also needs clear instructions and a way to respond when a person needs a different arrangement.

After several uses, compare the outcome with the original brief. Follow up on product concerns with the supplier, and seek appropriate advice for any layout or venue issue. Keep the review focused on evidence: what happened, where and under what conditions.

A church chairs comparison sheet

Create columns for supplier, model, total delivered cost, sample trial, materials, care instructions, stacking guidance, replacement parts, warranty and delivery date. Add a field for unresolved questions. A missing answer should remain visible rather than disappearing inside an overall score.

Record comfort and handling observations separately. One model may be comfortable to sit on but difficult to move in your room. Another may store neatly but not suit the intended duration of use. The comparison should make those tradeoffs understandable to the people approving the purchase.

A decision note could say: “Proceed with model B once the supplier confirms the tested upholstery and replacement foot reference. The sample trial was satisfactory, and the storage method fits the agreed room.” This records both the preference and the condition that must be met.

Budget for the whole seating project

The chair order may be part of a larger room improvement. Keep separate lines for furniture, delivery, any approved handling equipment and related work. Avoid allowing optional decorative choices to consume money reserved for essential requirements.

Use the church budget planning guide to connect the purchase with the wider budget. Distinguish an approved spending limit from a supplier estimate, and record who can authorise changes. Clear approval prevents informal additions during a showroom visit.

If the church buys in phases, ask whether the same model and finish are expected to remain available. Treat availability statements as information to confirm, not a guarantee of future stock. A phased plan should still work if an exact cosmetic match becomes difficult later.

Manage donations and mixed furniture

A donated chair is useful when it suits the church’s needs and condition standards. Review donations using the same basic questions about intended use, condition, handling and care. Accepting every item can create storage and maintenance work that exceeds its practical value.

Where several chair types are already in use, record their locations and appropriate handling instructions. Avoid mixing stacking methods or accessories between models without confirmation. A volunteer should be able to recognise which instructions apply to the furniture being moved.

Discuss significant donations through the church’s established approval process. Keep the conversation respectful and specific. The issue is whether an item serves the room and community well, rather than whether it matches someone’s personal taste.

Give volunteers a simple handover

Provide a short demonstration of the approved setup, movement and storage routine. Show the team where instructions are kept and how to report damage. Do not assume that experienced volunteers automatically know the requirements of a new chair design.

Use a simple room plan and an agreed reset arrangement. If different events need different layouts, label the plans clearly and identify who approves changes. This reduces the chance that a temporary arrangement becomes the default without review.

Keep a small condition log for recurring issues. Note the chair group, observation, date and action taken. Remove questionable equipment from use according to the church’s procedure and seek appropriate assessment. Clear reporting is more useful than expecting volunteers to improvise repairs.

Frequently asked questions

Should all church chairs be identical? A consistent appearance can be useful, but suitability and access needs come first. Different rooms or users may require different arrangements. Choose a coordinated approach without assuming that one model must serve every purpose.

Are padded chairs always the most comfortable? Comfort depends on the whole design and the person using it, not padding alone. Test the sample for a realistic period and record specific feedback. Upholstery also introduces care and maintenance considerations.

How many spare chairs should we buy? Base the decision on approved capacity, actual use, storage and replacement needs. Avoid choosing a percentage without considering the room and budget. Spares that cannot be stored appropriately may create more difficulty than value.

Is a sample trial necessary for a small order? It is still useful when the chairs will be used regularly. Even a short organised trial can reveal a mismatch before several units are delivered. The effort should be proportionate to the purchase and the consequences of a poor fit.

Make the purchase easy to explain

A sound church chairs decision has a clear purpose, a tested sample, a complete quotation and an organised handover. Keep those records together so future leaders understand what was bought and why. Good documentation also helps when matching replacements or following up on faults.

Explore ChurchesAdmin when reviewing how your office keeps operational records and coordinates events. Bring your real seating, setup and reporting process to a demonstration. Well-chosen furniture and clear administration support the same goal: a building that is easier for the church community to use.

Other websites to explore

Additional websites: prim.co.ke, zama.co.ke, vega.co.ke, awasa.co.ke, saseni.com, jaat.co.ke, tas.co.ke, dereva.co.ke, zes.co.ke.

Church Logo: 7 Checks for a Consistent Church Identity

A church logo often reaches a new volunteer as a tiny picture forwarded in a message. The volunteer stretches it to fit a banner, adds a branch name underneath and sends the result to a printer. Nobody intended to change the church’s identity, yet the building sign, Sunday bulletin and official letters now show three different versions.

The first task is not a redesign. Find out which mark is approved, where it came from, who can authorise its use and which files are suitable for the jobs ahead. This guide is for the church office or communications team managing an existing identity. It also explains how to brief a designer when there is a genuine need for a new original mark.

church logo planning illustration
Church Logo | churchesadmin.com | 0725345345

1. Establish which church logo is authoritative

Collect the versions currently in use: the website header, stationery, building sign, social profile, bulletin and ministry materials. Label each with its source and date if known. Differences in colour or wording may be deliberate branch conventions, or they may be accidental edits accumulated over several years. Do not discard or standardise them until the authorised leadership has identified the intended arrangement.

Distinguish a local church mark from the emblem of a denomination or partner. A popular image search result does not grant permission to use an organisation’s symbol or represent an affiliation. Obtain the approved files and use guidance from the appropriate organisation where relevant. Do not trace an official crest from a blurry photograph or present a lookalike as an approved version.

Write a short decision record naming the master, the approving role and any scope limits. For example: “Local office identity for [branch]; use with the full church name on correspondence; refer requests for external event co-branding to [role].” Keep the wording precise enough that a new volunteer can answer routine questions without making a new branding decision every week.

2. Inventory the places where recognition matters

List the actual surfaces used by the church. A weekly bulletin, letterhead, website, WhatsApp profile, welcome banner and embroidered shirt do not have the same space or reproduction quality. Identify the smallest normal use and the most distant normal use. Those two extremes reveal problems that a large, full-colour presentation on a laptop can hide.

Take photographs or screenshots for internal review. Note whether the church name remains readable, whether the symbol competes with another organisation’s mark and whether the branch is identifiable. Use the church bulletin design guide to test the logo beside the date, service information and notices. The logo should identify the issuer without taking the space readers need for the actual programme.

Prioritise the church logo surfaces that matter most. An old file on a retired poster may be an archival issue rather than an urgent replacement. An unclear sign at the entrance or a wrong branch on current letters deserves faster action. A practical inventory lets the team spend time and money where the inconsistency affects a real reader or visitor.

3. Request a clearly named church logo file set

Ask for the editable or scalable master in a format appropriate to the production work and for ready-to-use exports for ordinary office tasks. A printer may need a vector file; a volunteer preparing a simple document may need a transparent image of suitable resolution. Confirm the supplier’s requirements rather than assuming one file works for every purpose.

Prepare approved versions for light and dark backgrounds if needed, plus a one-colour version that remains recognisable without colour. Name each file by use, not just final or new. Examples might include “local-branch-letterhead-dark-on-light” and “main-symbol-one-colour.” Add the approved revision date to the master directory or file record.

Keep a brief explanation with the files. State which version goes on a letter, which can be used in a small profile image and whom to contact about unusual requests. Volunteers should not need specialist design software to choose a suitable approved export. A well-organised church logo folder saves more time than repeatedly asking the same designer to resend a file.

4. Test the church logo at real sizes

Print the logo at the size used on an ordinary letter and photocopy it once. Look at the smallest lettering and enclosed details. Have someone unfamiliar with the design read the church name without prompting. If the name becomes a grey line, increasing the quality of the printer may not solve the underlying problem; an approved simplified arrangement may be needed.

Next place the mark in the intended digital profile crop. A square image may be displayed as a circle, cutting off a long name or part of an emblem. Test the actual crop and check that the result still points clearly to the right church. Avoid squeezing a full address, slogan and branch name into the smallest icon. Provide those details in the surrounding profile or page instead.

For a large sign or banner, view a test from the normal approach. A mark can reproduce sharply while remaining too complex to recognise at a distance. Use the church room booking guide when arranging access for a physical proof or installation. The production team needs to know the location, substrate and visible area before choosing the final file.

5. Identify branches and ministries beside the church logo

A shared church identity can coexist with useful local labels. Choose a consistent position and wording for the branch name rather than letting each branch redraw the main emblem. Check examples with short and long branch names. The longest case often reveals a spacing problem the shortest example concealed.

Make the relationship between church and ministry clear. A youth activity poster may need the ministry name more prominently than the central logo, while official correspondence may follow the opposite order. Agree which elements can change for an event and which remain fixed. This gives volunteers room to communicate the occasion without gradually turning every ministry into a separate, unrelated visual identity.

Use the church leadership roles guide to name the person who approves exceptions. An event organiser may have authority to select the poster layout without having authority to create a new church logo. Explain that distinction in a sentence a volunteer can apply: “Use an approved export; bring a new emblem or affiliation request to the designated reviewer.”

6. Brief an original design only when the need is clear

If existing files cannot be recovered or the leadership approves a genuine identity change, write the problem before describing the appearance. A brief might say: “The current wording disappears on small bulletins, and visitors cannot distinguish the local branch on signs.” That gives a designer something to solve. “Make it modern” provides little evidence for choosing between proposals.

Identify the church name, audiences, approved themes, required uses, production limitations and decision owner. Explain any symbolism that must be retained or avoided, and let the appropriate leaders approve its meaning. Do not borrow another congregation’s distinctive artwork to save time. An original church logo should reflect the identity the church is authorised and willing to present.

Request proposals in the contexts where they will be used. Compare a letterhead, a monochrome bulletin and a profile image rather than assessing only a large decorative mock-up. Ask the designer to explain the intended hierarchy and provide a practical handover. Clarify the agreed rights and deliverables with the supplier before paying for production or distributing files widely.

7. Roll out the approved church logo in an orderly sequence

Start with documents that are created frequently and are easy to update: the current letter template, weekly bulletin master and digital profile. Then plan changes to physical signs, banners and uniforms around their normal replacement or an approved rollout budget. A decision to standardise the identity does not automatically justify replacing every usable object immediately.

Maintain a small tracker containing the surface, current version, replacement owner, deadline and final proof. Mark a change complete only after checking the actual output. Uploading a replacement file is not the same as confirming that the website displays it correctly or that the printer used the right artwork. Record where the approved files are stored and which outdated file should no longer be used for new work.

Use the church office handover guide to transfer the tracker when responsibilities change. Show the next person one routine task: prepare a letter or bulletin with the correct mark and branch label. The exercise reveals whether the guidance is understandable without relying on the previous volunteer’s memory.

Worked example: one emblem, two branches and a joint service

Imagine two branches sharing an approved central mark. One branch places its locality beneath the church name; the other uses a shortened name inside the symbol. At a joint service, the committee initially proposes printing the two versions side by side. A visitor could reasonably conclude that two unrelated churches are hosting the occasion.

The committee checks the approved identity and discovers that the branch label belongs outside the central mark. It prepares one shared event heading with both branch names clearly written below. On the internal planning sheet, each branch keeps its own contact and responsibilities. The public artwork now explains the relationship instead of asking visitors to infer it from slightly different emblems.

The example is not a rule for every denomination or church. Its lesson is to clarify the organisational relationship before solving a layout problem. If the branches are independent organisations, the appropriate design and approvals could be quite different. A good visual decision follows the facts rather than creating a relationship the paperwork does not support.

A practical church logo archive and handover note

Keep the original approval, current master, approved exports, supplier contact and permission or use guidance together. Store historical variations separately so they remain available for anniversary research without reappearing in routine correspondence. Add a short note explaining the difference between the current identity and an archival image.

If activities and office responsibilities are coordinated through ChurchesAdmin, record who keeps the master and when the next review is due. Check that access can transfer through the church’s normal procedure without sharing private passwords or depending on one person’s phone. A dependable church logo is recognised because the same approved mark appears clearly wherever the congregation encounters it.

## Run a recognition test without asking for a popularity vote

Print three approved-use examples of the church logo: a small bulletin header, a one-colour office letter and a mock entrance sign. Show each to a person who has not worked on the artwork. Ask which church or branch they can identify, which words they can read and what information they still need. Avoid asking only whether they like the design. A person can dislike a colour and still recognise the issuer correctly.

Repeat the test after removing the colour. If recognition depends entirely on a gold line that disappears in photocopies, the office may need an approved monochrome version. If the symbol is clear but the branch name disappears, adjust the label arrangement rather than redesigning the whole emblem. Record the actual failure and the smallest change that addresses it.

Keep the previous proof beside the revised one. This allows the approving leader to see why a change was requested and prevents the team from making unrelated alterations during review. A fair comparison uses the same size, paper, background and viewing distance for both versions. Otherwise a better printer or a larger mock-up can appear to improve a church logo that has not changed at all.

When the chosen version passes, add the example to the file guidance. A volunteer who sees the church logo correctly applied on a real bulletin has a clearer reference than one who receives a list of abstract design rules. The example also gives the next reviewer something specific to compare when materials are produced elsewhere.

Record who can supply a replacement export when a printer requests a different format. That person should work from the approved master and give the new export a clear name, instead of altering the only available file.

Other websites to explore

Additional websites: prim.co.ke, zama.co.ke, vega.co.ke, awasa.co.ke, saseni.com, jaat.co.ke, tas.co.ke, dereva.co.ke, zes.co.ke.

Church Letterhead: 7 Checks for a Reliable Office Template

A church letterhead should answer two questions before a recipient reads the body of the letter: which church sent this, and how can I reply through its office? An ornate crest cannot answer either question if the branch name is missing or the telephone number belongs to someone who left years ago. Good stationery starts with accurate identity and contact details.

This guide shows how to create one practical master for the church office, test it with a short invitation and a longer letter, and hand it over to the next secretary. It covers the document template itself. The authority to issue a particular letter, make a commitment or sign on behalf of a church must still come through the church’s own arrangements.

church letterhead planning illustration
Church Letterhead | churchesadmin.com | 0725345345

1. Agree the exact identity on the church letterhead

Write the approved church name exactly as it should appear in correspondence. If the church belongs to a larger organisation or has several branches, clarify which name represents the sender and which is a descriptor. A recipient should be able to distinguish the local office from a regional or national body without having to recognise a logo.

Ask the appropriate leader to confirm any denominational wording, symbols or affiliations before printing. Do not copy a crest from a website simply because the congregation shares a tradition. The local office may have an approved version with specific wording or placement. Keep that source file with the template so that a new volunteer does not have to search for it again.

Choose the branch convention at the beginning. For example, the master might show “[approved church name] — [branch or locality]” and repeat the office contact in a small footer. If several branches share the master, make the branch field conspicuous while drafting and mandatory before issue. A beautifully formatted letter sent under the wrong branch identity is still the wrong letter.

2. Select church letterhead contact details that remain useful

Include only channels somebody actually monitors. A general office email, office telephone and useful address may be enough. Avoid filling the footer with every ministry contact, social profile and individual leader’s number. A letterhead should remain usable when an office holder changes or a volunteer is away for a week.

Distinguish a postal address from the physical meeting location. If people deliver documents to one place and attend services at another, label both only when needed. Do not present an informal landmark as though it were a postal address. A recipient replying to a formal request needs the correct route, not a collection of geographical clues.

Test the church letterhead contact block through ordinary office procedures. Ask a colleague to read the printed number aloud, locate the email in a PDF and identify the correct office from the address. Confirm that the spelling and domain are current. Use the church communication plan to assign responsibility for monitoring and reviewing the channels printed on official stationery.

3. Leave room for the actual letter

A decorative header should not consume the space needed for a clear message. Build a test page containing a date, recipient address, subject line, salutation, four paragraphs and a signature block. If a routine one-page letter spills onto a second page because of a large header, the design needs adjustment before the office begins shortening its correspondence to fit the artwork.

Set consistent margins and choose a readable body font. Avoid using the decorative lettering from the logo throughout the document. The church name can carry personality while the message remains easy to read. Check the template with the office printer, including the non-printable margins that may trim a coloured band or footer line.

Think about writing space around the signature. A printed name, role and contact route may need room beneath a handwritten signature or an approved electronic process. Do not embed a reusable personal signature in a broadly shared blank master. Whoever can open the blank design should not automatically receive the appearance of someone else’s approval.

4. Define the first and later pages separately

The first page identifies the sender and recipient. A continuation page usually needs a smaller header or a simple reference, page number and date according to the church’s practice. Repeating the full decorative header on every page can waste space and make the document feel like several separate letters rather than one complete message.

Create a test letter that runs to two pages and one that runs to three. Check whether the subject, paragraph breaks, signature and attachments remain sensible. A final page containing only a signature or a single closing sentence may indicate excessive margins or an awkward manual break. Adjust the master or the letter deliberately rather than shrinking the entire document.

Compare the printed and PDF versions. Some office printers handle a different first-page header correctly while a PDF export shifts the footer or substitutes a font. Print the second page as well as the first. A continuation sheet with no identifying information can become detached and difficult to reconnect with the original correspondence.

5. Separate fixed church letterhead content from changing fields

Fixed elements are the approved name, approved artwork, office contact block and standard page layout. Changing elements include the issue date, recipient, subject, reference, signatory and any enclosure details. Assign a clear style or placeholder to each changing field. Remove sample recipient details from the blank master.

Use descriptive placeholders such as “[recipient organisation and branch]” instead of a realistic-looking name that a hurried volunteer may forget to replace. At the final proof, search for remaining placeholders and read the completed letter from the recipient’s perspective. A search is useful, but it cannot catch a real name left behind from last month’s correspondence.

Use the church invitation letter examples to test the master with an ordinary request. The template should support a clear subject and RSVP instruction without turning those items into permanent text. A training invitation and a meeting confirmation can share the same letterhead while asking entirely different things of the recipient.

6. Set church letterhead approval and issue rules

Name the role that owns the master and the roles permitted to issue particular kinds of correspondence. An administrator may prepare a draft without being authorised to sign a commitment or speak for another ministry. Clarify the route for approval rather than assuming that access to the letterhead supplies authority automatically.

Record the final issue date, recipient or recipient role, subject and approved signatory through the office’s usual process. Keep an issued copy distinct from a draft. Where a request changes after approval, decide whether the revised letter needs a new review. Changing a date or financial commitment is more significant than correcting a missing comma.

The church leadership roles guide helps make these boundaries visible. Keep the process proportionate: a routine acknowledgement need not follow the same review as a major commitment unless church policy requires it. Staff should know which route applies and whom to ask when a case does not fit an established example.

7. Review the church letterhead when details change

Make a short list of events that trigger a master review: an office move, a branch change, a new monitored email, a revised logo or a change in authorised signatory practice. Check printed stationery, digital templates and any form that reuses the contact block. Correcting only the main Word document does not update a stack of old printed paper.

When replacing a master, give the new version an effective date and identify where it is stored. Keep an archival copy where appropriate, but remove old versions from everyday use. Tell volunteers exactly what changed. “Use the master dated [date]; the reply address has changed” is more useful than sending an unexplained file named latest-final.

Use the church office handover guide to transfer ownership when a secretary changes. Ask the incoming person to create a fictional one-page letter and export it. That exercise reveals missing fonts, inaccessible files or unclear approval instructions before the first real letter is due.

Worked example: a branch office changes its telephone number

Imagine the head office number remains the same while the local branch switches to a new, monitored contact. The committee initially proposes printing both numbers without labels. A test reader calls the head office about a local workshop and is asked to call again. The problem is not a lack of contact information; it is an unclear choice between two correct numbers.

The revised church letterhead labels the local office number as the reply route and gives the head office contact only where relevant. The workshop invitation repeats the local RSVP route near its closing paragraph. The office checks the PDF, printed stock and any email attachment previously prepared for the event. It also tells the person answering the old number how to direct genuine enquiries during the agreed transition.

This example illustrates why a useful master needs an owner. An unlabelled second number can remain on stationery for years because every individual item looks plausible. Give someone responsibility for checking whether the complete letter makes sense to a recipient with no inside knowledge of the church’s office structure.

A copyable church letterhead proof checklist

Write these prompts on the review sheet: approved church and branch name; correct logo file; monitored reply channel; issue date and recipient; subject and authority; clear signature area; printed first page; printed continuation page; PDF on a phone; owner and effective date. Put a name beside each check that needs a different person’s knowledge.

Add one deliberately difficult test letter. Use a long recipient name, a two-line subject and an attachment reference. Check that nothing overlaps the header, the body remains readable and the closing does not land alone on a third sheet. A master that survives the difficult case usually handles routine correspondence with less adjustment.

If your team organises records with ChurchesAdmin, connect issued correspondence with the relevant meeting or activity through the approved office workflow. Keep the final document accessible to the people who need it, and keep the editable master under the appropriate control. A good church letterhead quietly does its job: the sender is clear, the recipient can reply, and the letter can be understood after it leaves the office.

## Test the church letterhead with a correction letter

Imagine an invitation was issued with the wrong hall name. The office now needs to correct the venue without implying that the date or purpose changed. At the top of the new letter, identify the recipient, the original issue date and the subject. In the first paragraph say exactly which detail changed. A clear church letterhead identifies the sender, while the body of the correction identifies what the recipient must do differently.

Prepare a paper and PDF version. In the paper proof, check that the corrected location and the closing remain on the same sheet where practical. In the PDF, confirm that the recipient cannot see comments or tracked drafting notes. Read the office reply address in the exported version, not only in the editable master. Then file the correction with the original issued copy through the normal office process.

This is a useful training exercise because it tests more than the visual design. The volunteer must select the right branch, find the original correspondence, identify the authorised signatory and use the current template. If any step depends on knowledge held by one person alone, add a short instruction to the handover. Keep those instructions outside the public letter. The reader needs a clear correction, not the office’s internal approval history.

Repeat the test after a stationery change. A new church letterhead can alter page breaks, reference placement or the visibility of the footer. One realistic correction letter will reveal those effects more reliably than admiring an empty template on a large screen.

Keep one clean printed reference in the office with the master’s effective date. When a printer setting changes, compare the new output with that reference before producing a large batch of letters on an altered layout.

Other websites to explore

Additional websites: prim.co.ke, zama.co.ke, vega.co.ke, awasa.co.ke, saseni.com, jaat.co.ke, tas.co.ke, dereva.co.ke, zes.co.ke.

Baptism Certificate: 8 Practical Checks for a Church Office

A baptism certificate is often kept long after the service programme has disappeared. A missing accent in a name, a date copied from a rehearsal or the wrong branch on the heading can therefore matter more than an elaborate border. Start with the congregation’s approved record and wording, then design the document around the facts it is meant to preserve.

This guide covers office preparation, not the religious requirements for baptism or the legal status of any particular document. Those matters depend on the church and the circumstances. Follow the appropriate church authority for the wording, authorised signatories and record-keeping procedure. The examples use placeholders and do not represent an actual baptism or a universally recognised certificate.

baptism certificate planning illustration
Baptism Certificate | churchesadmin.com | 0725345345

1. Define what the baptism certificate records

Ask the authorised leader which event and details the document is intended to confirm. A church may distinguish baptism, dedication, confirmation and admission to membership. Do not lift wording from a different ceremony simply because its template looks appropriate. Write the name of the document in full and check it against the actual occasion.

Distinguish the date of the ceremony from the date of issue. They may be the same on the first copy and different on a later reissue. If both appear, label them clearly. Avoid placing a single unlabeled date below a signature where a reader cannot tell which event it refers to. The distinction becomes particularly important when a certificate is prepared some time after the service.

Use the church membership record book guide to think about how an office record and a keepsake differ. The register supports future verification; the certificate presents an approved subset to the recipient. It need not display every internal reference or private detail stored by the church.

2. Confirm the baptism certificate name from the right source

Do not assume that the name on a public announcement is the name the recipient wants on the certificate. A nickname, an abbreviated middle name or a spelling used informally in a group can find its way into the design. Ask the person responsible under your church’s process to confirm the exact form to be printed, including order, punctuation and capitalisation.

Read the spelling back without making the recipient explain personal history at the front desk. Where a parent, guardian or designated representative is involved, follow the church’s established arrangements. Keep the confirmation with the authorised record. Avoid passing lists of names through an open volunteer group just because several people are helping to prepare the service.

Test the longest name in the batch. If the text no longer fits, adjust the layout rather than shortening the name without agreement. A two-line name can look intentional when the design provides enough space. A smaller font may work for a modest difference, but reducing it until the recipient’s name is barely readable defeats the purpose of the document.

3. Use approved baptism certificate wording

A neutral working layout might read: “[Church name and branch]. Baptism certificate. This certifies that [confirmed name] was baptised on [full ceremony date] at [place] according to the practice of [church]. Signed: [authorised name and role]. Issued on [date, if different].” Replace the wording with the version approved by your church; this example is a structure for review, not a prescribed religious formula.

Ask the reviewing leader to approve the complete sentence, not only the heading. The title of the person officiating, the name of the congregation and any additional statement should reflect what the church can confirm. Do not insert a claim about membership, standing or recognition elsewhere unless it belongs in the approved wording and is supported by the record.

Keep the master wording separate from the individual names. A blank master makes it easier for the next office volunteer to prepare a correct document without copying a finished certificate containing somebody else’s information. Date the approved master and keep older versions distinguishable from the one currently in use.

4. Design for the name, not the border

Make the document title, recipient name, ceremony date and church identity easy to find. Secondary details such as an internal reference can be quieter if the church includes them. Keep generous space around the signature area. A decorative seal printed too close to a signature line can make it difficult to sign without covering other information.

Choose type that reproduces clearly on the intended paper and printer. Thin script may look elegant on a large screen and disappear on an office printer. Print the actual size on ordinary stock first. Check the document at arm’s length and then close up, including every digit of the date and any reference used to locate the original entry.

A church emblem can help identify the issuer, but it does not correct an ambiguous statement. Use an approved image at suitable resolution and retain a plain version that still looks clear in black and white. If the design needs premium stock to be readable, simplify the artwork before committing to a more expensive print run.

5. Reconcile the ceremony list after the service

Preparation can begin in advance, but the final issue should follow confirmation of what actually took place. A person may postpone, a service location may change or an officiating leader may be replaced. A printed programme is a plan, not the final record of the ceremony. Cross-check the relevant details through the authorised person before signing and distributing the certificate.

Use the church service planning guide for the programme and day-of-service responsibilities. Keep a separate, appropriately restricted record of certificate status. Useful labels might be awaiting confirmation, proof checked, signed and delivered. These states describe office work; they should not be treated as judgments about the individual.

Avoid leaving unsigned copies in an open pile near the welcome desk. Identify who receives the confirmed list, who prepares the proof, who signs it and who hands it to the recipient. A short documented chain is particularly useful when different people prepare the paperwork and lead the service. No one should have to guess whether an unsigned copy is ready to issue.

6. Run a two-reader baptism certificate proof

Give the first reader the approved source and ask them to compare each field, including the name, ceremony date, place, church identity and signatory. Give the second reader only the printed proof and ask what the document appears to say. The first check catches transcription errors; the second catches ambiguities that remain even when every individual word is spelled correctly.

Read digits separately and verify the month in words where possible. For example, a numeric date can be misread when the recipient later shares it outside the original community. A full month name and four-digit year usually make the intended date easier to understand. Choose the format the church approves and apply it consistently across the batch.

Record the correction on the source or proof according to your process, then produce a fresh copy. Avoid correcting one design file while leaving the office record unchanged. If the underlying record itself needs an amendment, follow the church’s authorised correction procedure. A designer should not quietly resolve a factual disagreement by choosing the version that fits the page.

7. Arrange delivery without publicising private records

Decide how certificates will be handed over before printing. If the church plans a public presentation, confirm what is appropriate to announce and what remains private. A person agreeing to receive a certificate does not necessarily agree to have its details photographed and circulated online. Handle public images separately from the office document.

For private collection, identify an approved route and a person responsible for outstanding copies. Record delivery according to the church’s normal procedure. If someone is absent, keep the certificate accessible to the authorised office team but away from an open noticeboard or public tray. Give the recipient a clear way to report a spelling error after collection.

The church office handover guide helps when the office volunteer changes between printing and collection. A useful handover tells the next person which copies remain, where they are securely held and who can approve a correction. It does not need a full personal history attached to an ordinary collection task.

8. Handle baptism certificate corrections consistently

Start a replacement request by locating the original church record through the agreed office process. Establish whether the person needs a duplicate of an accurate document or correction of an error. Those requests look similar at the counter but lead to different decisions. A duplicate may reproduce the approved facts; a correction may require a formal amendment first.

Suppose an original baptism certificate shows the correct ceremony date but omits a confirmed middle name. The office verifies the intended spelling against its authorised source, obtains the appropriate approval, updates the record if necessary and prepares a corrected copy. It preserves the ceremony date and separately records the new issue date. This fictional example illustrates the distinction without prescribing a policy for every church.

Keep the reason, authorisation and issue status in the restricted office record. Explain to the recipient what has been changed and how the new copy is labelled under church procedure. Do not invent a past signature or present a newly produced document as an untouched historical original. If the historic record is incomplete, refer the case to the authorised leader rather than filling gaps from memory.

A batch-control example for twelve baptism certificates

Imagine twelve names on the advance preparation list. After the service, the authorised record confirms eleven baptisms; one person postponed. The office should not simply print twelve signed documents because twelve templates were prepared. Mark the postponed item as not issued and separate it from the eleven confirmed proofs. The count is a check on the paperwork, not a public attendance report.

During proofing, ten names match and one spelling needs confirmation. Ten can progress according to the normal signing arrangements while one remains clearly pending. Avoid mixing a provisional copy with the completed stack. When confirmation arrives, produce a new proof and record its status. At delivery, reconcile how many were prepared, signed, collected and retained for later collection.

Use the church leadership roles guide to clarify who can approve exceptions. If the church coordinates its records through ChurchesAdmin, demonstrate the actual access, verification and handover workflow before assuming that a particular certificate function exists. A well-run baptism certificate process ends with an accurate document for the recipient and a reliable record for the church.

## A baptism certificate proof for a long name and a late issue

Create a test with fictional information before using the blank master for a real person. Give the test recipient a long multi-part name and use a ceremony date several months before the issue date. Ask an office volunteer to prepare the baptism certificate without verbal instructions. Does the full name fit? Can a second reader distinguish the ceremony from the issue? Is the signature area still large enough?

Now imagine the church name has changed since the ceremony. Do not quietly substitute the new name, assume the historic name or invent a combined identity. Refer the question to the authorised person and ask what wording the church can verify. The approved answer may need a short explanatory note in the office record. The person preparing the artwork should not make that historical decision alone.

Finally, print the test, fold or package it as it will be delivered and read every field again. A decorative envelope can cover the recipient’s name when certificates are stacked or conceal an unsigned copy. Choose a handling method that lets the office identify the right recipient discreetly. Keep the fictional proof separate from issued records and clearly mark it as a sample. A blank baptism certificate is a production tool; it should never be mistaken for evidence that an event occurred.

Ask the recipient to keep the office contact with the certificate. If a question arises later, the person can request verification through the proper channel without circulating a photograph of the complete document to unrelated volunteers.

Other websites to explore

Additional websites: prim.co.ke, zama.co.ke, vega.co.ke, awasa.co.ke, saseni.com, jaat.co.ke, tas.co.ke, dereva.co.ke, zes.co.ke.

Church Banner Design: 7 Tests for a Readable Welcome Banner

A church banner design that looks balanced on a desk can disappear in a hall. The lettering may be hidden behind seated guests, a fold can cut through the church name, or a dramatic background can make the welcome message difficult to read. Before choosing colours, stand where the banner will be used and decide what a person should understand from that position.

A banner is not simply a larger poster. A poster can carry event details for a reader who stops close to it. A banner often identifies a place, welcomes people or directs them from a distance. The guide below focuses on that physical job, with a proofing process that a small church can use before committing money to printing or installation.

church banner design planning illustration
Church Banner Design | churchesadmin.com | 0725345345

1. Give the church banner design one physical purpose

Choose between three common jobs: identify the entrance, welcome people inside or direct them to a particular activity. A single banner rarely performs all three well. An entrance banner needs a recognisable church name and perhaps a direction. A welcome banner inside the hall can use a short message. A directional banner needs an unambiguous destination and an arrow that points the right way when installed.

Write a one-sentence brief: “A person approaching from [location] should recognise [destination or occasion] before reaching [decision point].” This brief gives the committee a test for every proposed line of copy. A long theme may be meaningful but not necessary for finding the entrance. Put extra information in the programme or poster that people can read once they have arrived.

Visit the site during the type of gathering for which the banner is intended. Furniture, open doors and people can change the sightline. Photograph the view from the actual approach and note which part of the wall remains visible. A photograph of an empty hall taken from the stage may give a completely different impression from the view of an arriving visitor.

2. Measure the usable area and discuss installation

Record the available width and height, including obstructions, door movement and nearby fittings. Ask the venue contact what can be attached, where and by whom. A freestanding display, a wall-mounted banner and a suspended banner have different installation requirements. Have the venue and appropriate installer approve the method rather than assuming that a convenient rail or beam is suitable.

Ask the printer or installer which parts of the finished item are occupied by hems, pockets, stands or other fixing details. The printable rectangle in a design file may not be the visible rectangle after installation. Reserve space around the message so that an edge, fold or fitting does not obscure an important letter.

Check the route and setup time. A banner may fit on the wall but not through a narrow stairwell in its assembled form. Find out how it will be transported, stored, unpacked and installed. Use the church room booking guide to reserve access before the public event and allow time to remove the banner afterwards. Do not leave installation as an unassigned task for the first usher who arrives.

3. Write copy a moving reader can understand

Start with the church name or destination, then one message. “Welcome to [church and branch]” may be enough for an entrance. For a workshop, “Volunteer training — Side Hall” may be clearer than a theme that requires explanation. Use a date only when the banner is specific to one occasion. An evergreen banner becomes expensive to replace if it includes details that change every month.

Read the message aloud at walking pace. Ask a colleague to repeat it after looking for a few seconds. If they remember a decorative slogan but cannot name the destination, make the destination more prominent. If they can name the destination but do not know whether to turn left or right, the problem is the instruction or the placement, not the colour palette.

Keep supporting information at the appropriate scale. A full phone number or a long web address may be useful on an indoor banner read from nearby, but useless across a street. Avoid adding a QR code unless people can safely stop at the intended distance and the destination has been tested. Put detailed instructions in the church bulletin when that better suits the reader.

4. Test lettering, colour and the background together

Print a section containing the headline at its intended size. A small full-page proof can show composition but cannot tell you whether the actual letters are readable from the doorway. Place the sample near the intended location and view it from different approach angles. Check the lighting at the time the banner will be used, not only during an afternoon site visit.

Choose a background that supports the lettering. A photograph with alternating light and dark areas can hide different letters in different places. Try a solid panel behind the message or a quieter image. If the design depends on a thin outline around every letter, test whether that outline survives printing and any wrinkles in the material.

Do not rely on colour alone to separate a direction from a welcome message. A clear arrow, spacing and text hierarchy should still work in a monochrome proof. Test the approved church emblem separately. An intricate mark that is recognisable on stationery may need an approved simpler version for a banner. Use the correct artwork rather than tracing a low-resolution screenshot.

5. Compare materials for your church banner design

Ask suppliers to describe the finished product rather than only naming a material. Is it intended for the proposed indoor or outdoor setting? How is it installed and stored? What cleaning or handling does the supplier recommend? What finish and colour variation should the church expect from the proof? Request a sample or representative product where practical.

Distinguish the printed banner from the hardware used to display it. A church banner design quotation for a print alone is not comparable with one that includes a stand, fitting and delivery. Ask which components can be reused if the message changes and what replacement artwork would cost. A low initial price may lead to an avoidable second purchase if the display system cannot be used again.

Consider how often the church will move the banner. A permanent welcome message and a portable event display have different priorities. A product that looks impressive once may be inconvenient to pack and carry each week. Give the people responsible for setup a chance to handle the sample. Their experience belongs in the purchasing decision alongside appearance and price.

6. Approve the church banner design proof

Prepare an order specification containing the confirmed size, visible area, message, orientation, material, fixing method, quantity, delivery location and deadline. Attach the exact proof and identify who can approve a change. Avoid sending a printer several similar files and relying on the word final in the filename to settle which one should be produced.

Give one reader the wording and location facts, and another the physical specification. The first checks the church name, branch, event and direction. The second checks trim, folds, clear area and installation details with the supplier. Both should compare the same proof version. If the venue changes the installation position, repeat the direction and sightline checks before printing.

Follow the church budget planning guide to distinguish a quotation from an approved order. Ask for the total including agreed production, delivery and installation. Record any assumption about access or timing. A supplier should not have to discover on arrival that the banner must be installed in an occupied hall during another service.

7. Walk the route after installation

Once the approved installer has finished, view the banner from every intended approach. Check that the arrow points towards the actual destination, the message is not hidden by a door and people do not need to stand in a path of movement to read it. Ask a visitor unfamiliar with the building where they would go next. Their answer matters more than the committee’s memory of the layout.

Tell the church welcome team what the banner promises. If it says registration is in the side hall, volunteers should know the same location and the route there. If a change is necessary, use a clear temporary correction and brief the team. An attractive banner pointing visitors to an empty room is worse than an ordinary sign giving the right directions.

After the event, record whether people still asked for directions and from which approach. That information may reveal a missing second sign rather than a problem with the main design. Store reusable materials according to supplier guidance and label them with the intended location and orientation. The next volunteer should not need to reconstruct the setup from a photograph on a private phone.

Worked example: a reusable welcome or a dated event banner?

Imagine a church planning a one-day gathering followed by regular visitor services. Option A is a large event banner with the date and speaker. It communicates the occasion clearly but becomes outdated the next day. Option B is a reusable welcome banner with the church name, supported by a separate removable event notice. It can serve future gatherings but may need more than one printed item now.

The church banner design committee compares the quotes on the same basis, including mounting, transport and storage. It asks how many future uses are realistic rather than assuming a reusable product will automatically be used many times. If the venue and identity are stable, the second option may offer better value. If the event needs a distinctive message at a different venue, the first may better serve the actual purpose.

Write the decision as a practical statement: “We selected the reusable entrance banner because visitors will use this entrance at monthly services; the event name and date will appear on a separate notice.” That explanation gives the designer a useful brief and helps the next committee avoid printing a new large banner for every small change in programme.

Keep a church banner design and installation record

Save the approved proof, supplier specification, installation contact and one dated photograph of the final position. Note where the banner is kept and the condition in which it was returned. Keep any access or safety information within the appropriate venue process rather than treating the design file as installation guidance.

If your church uses ChurchesAdmin to coordinate events or rooms, connect the banner task to the confirmed venue and setup time. The value of church banner design is measured at the entrance: a visitor sees the right message, recognises the right place and continues without having to guess what the committee meant.

## A church banner design test for a change of entrance

Imagine a service normally uses the front entrance but a special gathering will use a side entrance. The existing church banner design welcomes visitors at the front without giving directions. Simply moving the banner to the side door may identify the destination once someone reaches it, but it does not help a visitor standing at the original decision point.

Walk the route from the usual arrival point. Decide where a temporary direction is needed and where the reusable welcome banner belongs. Test the arrow from the visitor’s perspective, not from the viewpoint of the volunteer hanging it. Ask whether the destination remains visible when the queue grows or a vehicle stops nearby. A second small direction sign can be more useful than increasing the size of the main banner.

Record the temporary arrangement and its removal time. After the gathering, return the permanent message to the correct location and remove the exceptional directions. A church banner design succeeds when it works across the whole arrival route. The printed object is only one part of that route, and an outdated arrow can undo the clarity of an otherwise well-made welcome.

Before filing the proof, write the viewing direction on its label. A future coordinator can then distinguish the banner intended for the main entrance from a similar design meant to be read from inside the hall.

Other websites to explore

Additional websites: prim.co.ke, zama.co.ke, vega.co.ke, awasa.co.ke, saseni.com, jaat.co.ke, tas.co.ke, dereva.co.ke, zes.co.ke.

Church Poster: 7 Practical Checks Before You Print or Share

A church poster has one advantage over an announcement made after a service: someone can take the details home. It also has one weakness: a person walking past cannot ask the poster a question. If the largest line says “You are invited” and the venue is hidden in a corner, the design has used its best space to say the least useful thing.

Start with a real job for the poster. A member might need to register for a workshop, a neighbour might want to attend a service, or a visiting choir might need directions. Those are different audiences and actions. This guide takes a single fictional workshop from the first request through print, mobile sharing and a last-minute room change. Replace every illustrative detail with information your church has approved.

church poster planning illustration
Church Poster | churchesadmin.com | 0725345345

1. Write the church poster as five lines of information

Before opening a design tool, write the event name, the intended audience, the date and time, the venue and the next action. If any of those facts remains provisional, mark it in the working copy. A designer can solve a crowded page, but cannot decide whether a workshop is open to all members or limited to a nominated group.

Consider this fictional starting point: “Volunteer welcome workshop. For new and returning ushers. Saturday [full date], 9–11 am. Side hall at [church and locality]. Register with the office by [deadline].” The wording is plain enough for a reader to decide whether the event is relevant. A warmer line can follow if space permits. It should not displace the information needed to attend.

For each church poster, write down who can confirm each fact. The calendar coordinator confirms the date; the room coordinator confirms the venue; the organiser confirms the audience and response route. Check the church calendar planning guide when two activities share a building. An approved event date does not automatically confirm the particular room mentioned on the artwork.

2. Choose one church poster headline and one action

A church poster headline should help a person identify the occasion without reading the rest of the sheet. “Training for new ushers” tells a clearer story than “A special opportunity awaits.” If the occasion has a theme, put the theme below the descriptive headline unless the theme itself is already widely understood. Newcomers do not share all the context that regular members bring.

Choose the principal action. “Attend on Sunday” and “register by Thursday” are not interchangeable. If registration is required, say how to complete it and what happens next. If no registration is needed, avoid an unnecessary form. A contact for enquiries can sit below the main action rather than competing with it in equally large type.

Try the five-second test. Show the draft briefly to someone who did not organise the event, hide it and ask what it was for. Then show it again and ask what they would do next. Record what they actually say. If they remember the decorative background but not the workshop, the problem is hierarchy rather than a lack of enthusiasm from the reader.

3. Design for the distance at which people will read it

A noticeboard beside a doorway and a poster seen across a street require different levels of detail. Measure the actual viewing distance and print a sample at the intended size. Put it where it will be displayed and approach from the normal direction. A type size that looks bold on a laptop may become a thin grey line under a dim corridor light.

Use three levels of emphasis: an event headline, the date and venue, and supporting details. Keep related facts together. If the start time appears near the top but the venue is isolated at the bottom, the reader has to assemble the invitation from fragments. A short block of aligned text is often easier to scan than several coloured badges.

Check contrast without relying on colour alone. Print a black-and-white proof if the office may photocopy the poster. A pale headline on a patterned photograph can almost disappear. Move the words onto a solid area or choose a simpler image. Do not solve every legibility problem by making all the text bigger; remove a sentence that belongs in the longer invitation.

4. Prepare a mobile version of the church poster

A photograph of a finished print poster is rarely the best phone edition. It may include the edge of the noticeboard, glare or tiny body text. Export a clean mobile layout and accompany it with a short text message containing the event, date, venue and action. Someone forwarding the message should not need to retype the important information.

Assume the post may travel outside the original group. Replace “this Saturday” with the full date and “our hall” with the church name and locality. Do not publish a personal number merely because it was convenient in a planning conversation. Use the contact route approved for a public notice, and identify who checks messages received there.

For an invitation to another congregation, a poster may work best as an attachment to a church invitation letter. The letter can explain whether guests are invited to attend, speak or send delegates. Keep the public poster short while giving the receiving office the information it needs to respond accurately.

5. Check the image, names and permissions

Choose an image because it helps identify the occasion, not because it fills an awkward gap. A workshop for ushers might show a welcome team at an entrance. A generic photograph of a large crowd may imply a different event or scale. If the image is illustrative rather than a photograph from the church, do not caption it as evidence of a past gathering.

Confirm permission before using identifiable people, a guest’s portrait or another organisation’s artwork. Being invited to participate is not the same as agreeing to appear in publicity. A guest who is still considering the invitation should not be presented as a confirmed speaker. Ask the organiser to verify the name, title and agreed public role against the actual response.

Where a logo is used, obtain the approved file rather than copying a small social profile image. Check its placement after exporting. Fine details can blur when reduced or printed on inexpensive paper. Give it a clear area around it and resist enlarging it until it competes with the event name. The reader needs to identify both the host and the occasion.

6. Proof the church poster with two different jobs

Ask the first reader to check facts against the approved source: date and day, start and finish, audience, room, response deadline and contact. Ask the second reader to use the poster without prior knowledge. Can they decide whether they should attend, locate the building and explain the next action? These checks catch different kinds of mistakes.

Test a registration link or QR code from the printed proof, using the access a visitor would have. A link that opens for the organiser may lead another person to a sign-in screen. Provide a readable alternative where possible. For the mechanics of collecting an appropriate response, see the church event registration guide.

Give the approved file a clear name containing the event, date and version. Distinguish the print proof from the mobile edition. Record who approved the final facts and who sends the file to the printer. This prevents two volunteers independently distributing different versions after a late correction has been made in only one copy.

7. Plan for corrections and removal

Choose a person to maintain a small distribution list: which boards received the poster, which groups received the mobile version and which office holds the master. This is not a contact database for every individual who saw it. It is a practical map of where the host can issue an accurate correction.

Imagine the workshop moves from the side hall to the main hall after a printed batch is distributed. A corrected message should say “Room changed to the main hall” near the top, then repeat the event and date. Replace the printed copy or add a clear authorised correction. Let the church usher team know what to tell someone carrying the older version.

Remove or archive the church poster once the event ends. An old registration link looks current to someone who missed the date, especially when the year was omitted. Keep one approved example with the planning record. During the review, compare the questions received with what the poster said. If several people asked whether the workshop was for them, improve the audience line next time.

Worked example: rewrite a crowded invitation

The committee’s first draft reads: “All are warmly invited to our wonderful upcoming empowerment and service workshop with exciting sessions for everyone. Kindly plan to attend in large numbers.” The copy has energy but gives no immediate reason for a particular reader to act. More importantly, the organiser actually intends the session for those serving at the doors. “Everyone” creates the wrong expectation.

A stronger draft reads: “Welcome-team workshop. For current and prospective ushers. [Day, date and time]. [Church, hall and locality]. Bring the current welcome checklist. Confirm attendance with [office route] by [deadline].” A final sentence can explain the benefit: “Practise greeting visitors, answering questions and handing over concerns.” Now the invitation identifies both the audience and the useful work they will do.

The team tests it on paper and finds that the locality wraps onto a separate line below the registration deadline. They move the full venue together, shorten the heading and retain the deadline in its own action block. Nobody needs to redesign the event. A small editorial change has made the same facts easier to use.

A reusable church poster approval note

Copy this short note for the next issue: “Poster owner: [role]. Event and audience confirmed by: [role/date]. Venue confirmed by: [role/date]. Contact and registration route tested by: [role/date]. Image and names approved for: [print/mobile/public website]. Final version issued: [date]. Remove or replace after: [date].” Keep the note in the working file rather than putting it on the public poster.

Ask what approval means for each field. A person who confirms the room does not necessarily approve the guest photograph. A leader who approves the wording does not automatically check that a QR code opens on an unfamiliar phone. Splitting these jobs prevents a vague “looks fine” from being interpreted as a check nobody actually performed.

If you coordinate activity details through ChurchesAdmin, use one confirmed record as the source for the print and mobile editions. The test of a good church poster is not how many decorations it carries. It is whether a reader can decide, within a few seconds, what the occasion is, whether it is for them and how to take the next step.

## A church poster test for a second branch

Suppose the same workshop runs at two branches on different weekends. A single church poster listing both dates can be economical, but only if the reader can match each date to the correct venue. Put each branch, date, start time and response route in its own block. Do not put the two dates on one line followed by two addresses elsewhere and expect readers to connect them correctly.

Try two separate proofs with different volunteers. Ask one person when the first branch meets and the other where the second branch meets. If either gives the wrong combination, prepare two versions or simplify the layout. Name the files by branch and date, then ask the distribution owner to confirm which version goes on each board.

When one event is full, withdraw or revise only the affected edition. A short note saying “the workshop is full” can wrongly stop registrations at the other branch. Specify the branch, date and available alternative. This small example shows why a church poster needs to preserve context even when photographed, forwarded or read without its original caption.

Other websites to explore

Additional websites: prim.co.ke, zama.co.ke, vega.co.ke, awasa.co.ke, saseni.com, jaat.co.ke, tas.co.ke, dereva.co.ke, zes.co.ke.